Side Eye: Diode Dynamics SS2 LED Pods + Z1 Off-Road Brackets
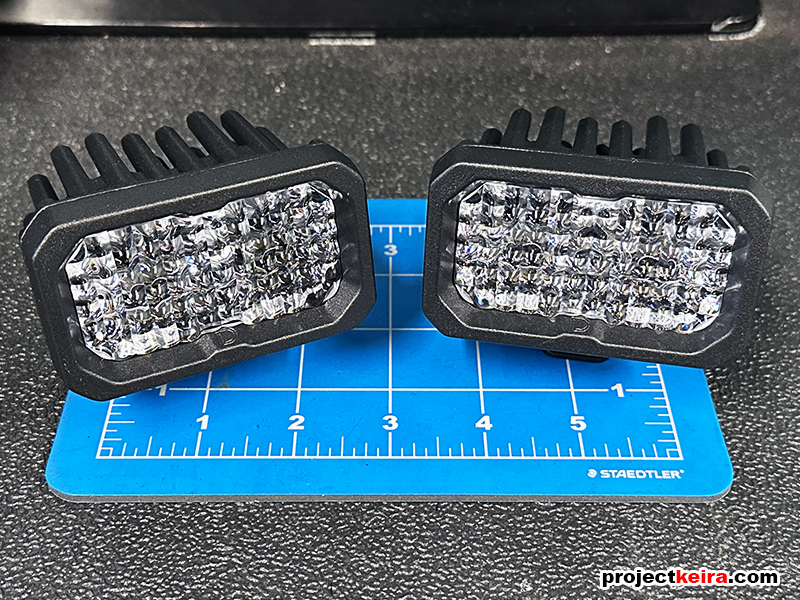
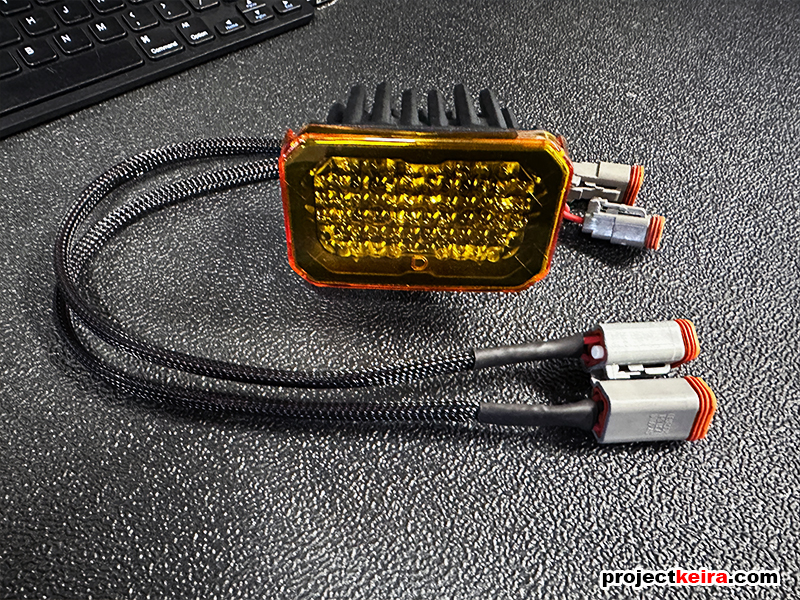
The third and final part of my (external) lighting upgrade from Diode Dynamics was to add-in some off-road specific ditch lamps. To keep the theme going, I chose Diode Dynamics SSC2 LED pods for my ditch lamps. These have the same rugged, high quality external design very similar to my SS2s – but at half the height, giving them a rectangle shape that is lower in profile. I went with the white “flood” optic, but I also picked up a pair of amber lamp covers to experiment with. Here’s how the lamps look, easily identifiable as Diode Dynamics by the heatsink casing:

I wanted to add ditch lamps since 2020, but the available mounting options were limited. I actually bought a set of Rago Fabrication brackets a couple of years ago but I didn’t like how they were such a pain to install (their “instructions” basically tell you to yank your fenders outward just to sandwich the brackets under the hood hinges… LOL) and I didn’t like how they smashed the corner windshield trim. It was also a no-go for the Nisstec/P&P brackets as well; their design was easier to install (using the existing fender bolts) and had the bracket sticking up from between the hood and the fender; however, when I saw the instructions where it said, “…rubber strip protects your hood and fender paint” I passed on those too. Sometime in between then and now I was thinking of modifying a set of Tacoma hood-mounted brackets, but then I saw the Z1 Off-Road Ditch Light Brackets and ordered up a set.
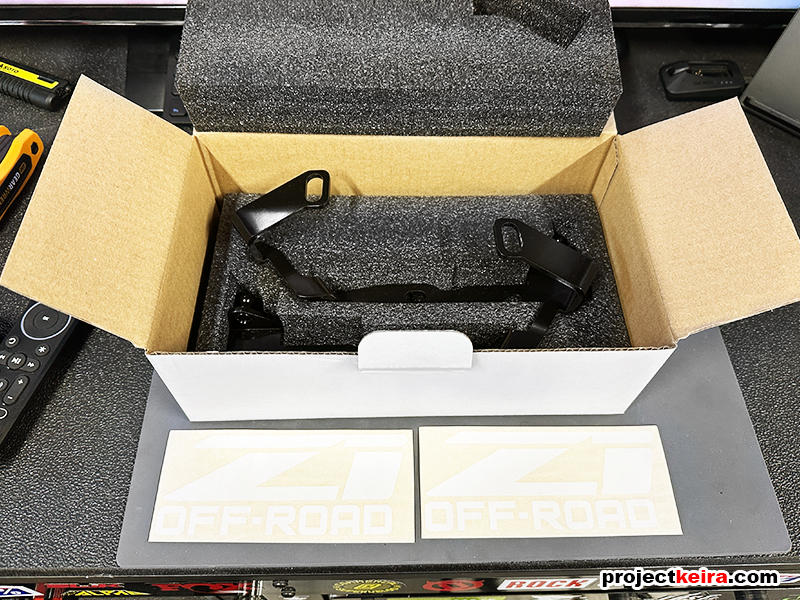
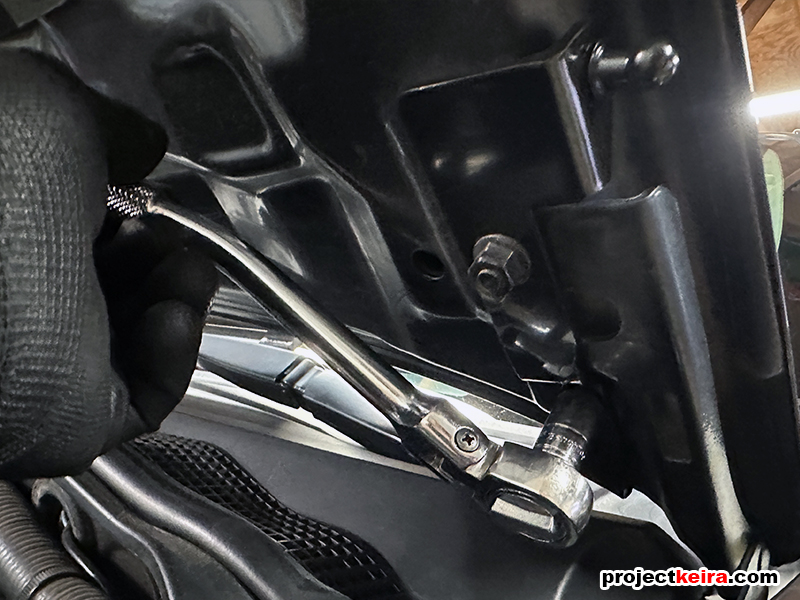
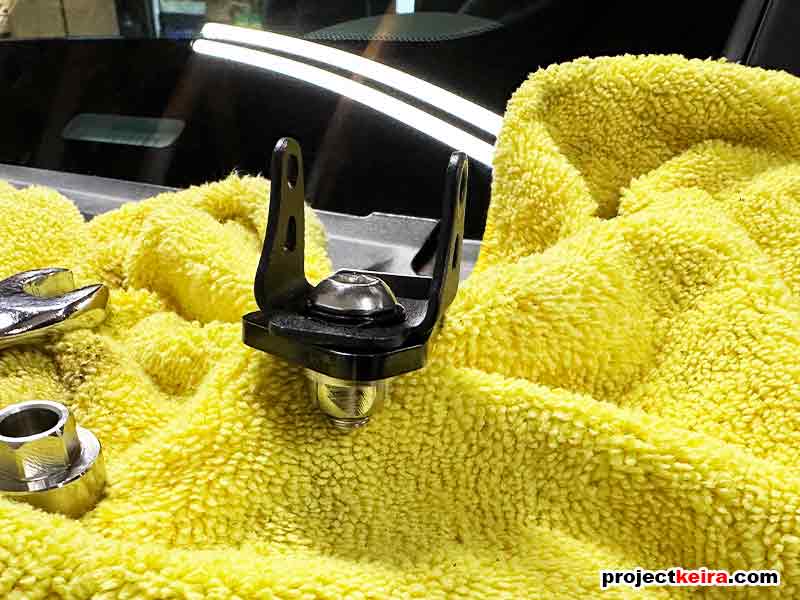
The Z1 Ditch Light Brackets (MSRP $99.99) arrived well packaged, and basically ready to install. Z1 also offers a combo set that includes the Ditch Light Brackets plus a pair of gas-charged hood struts for $155.99 MSRP, but I already had the Off-Road Gorilla hood struts installed on my truck. I was curious to see if the Z1 bracket would work with my current ORG struts. I removed one of my ORG brackets to compare:
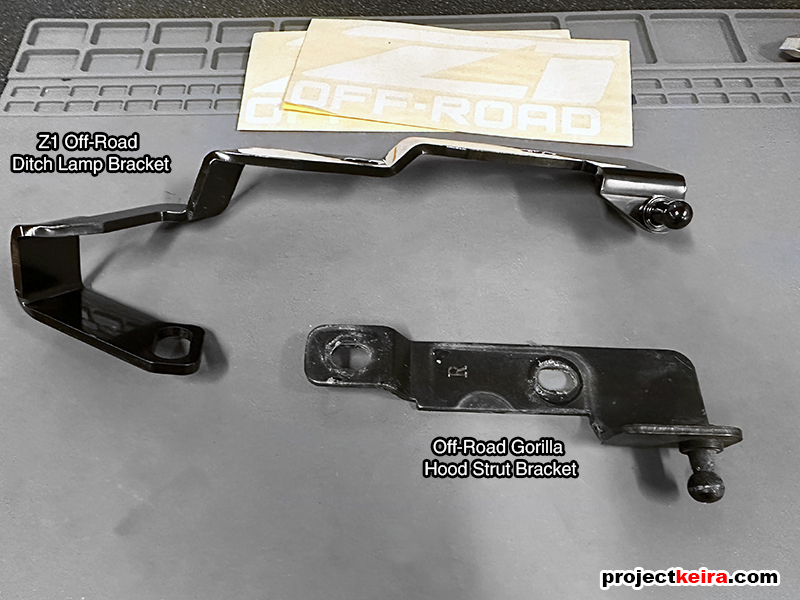
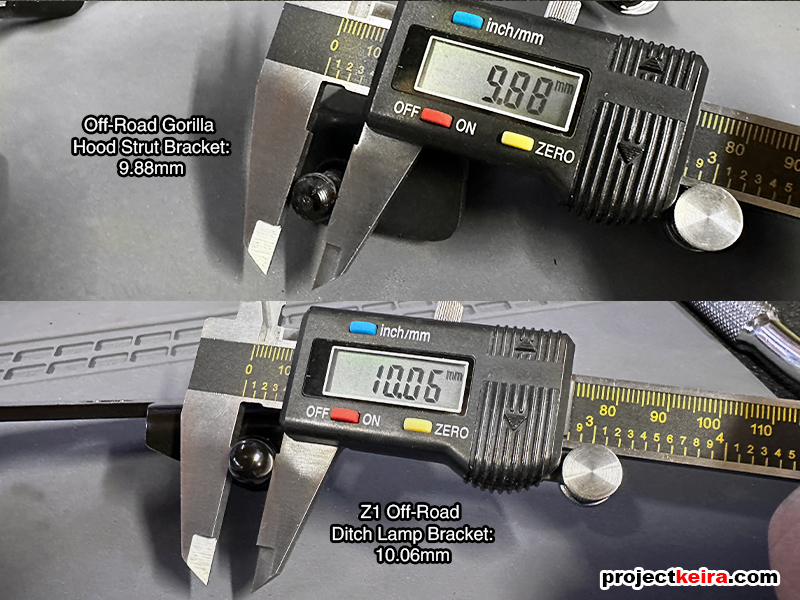
The Z1 bracket mounting ball was a hair larger than 10mm in diameter, while the ORG bracket mounting ball measured 9.88mm in diameter – mind you, the ORG brackets/struts were originally installed back in 2017, so that measurement includes wear and tear. Anyhow, the measurements looked like it would work so I went ahead and swapped out the ORG brackets for the Z1 Ditch Light Brackets.
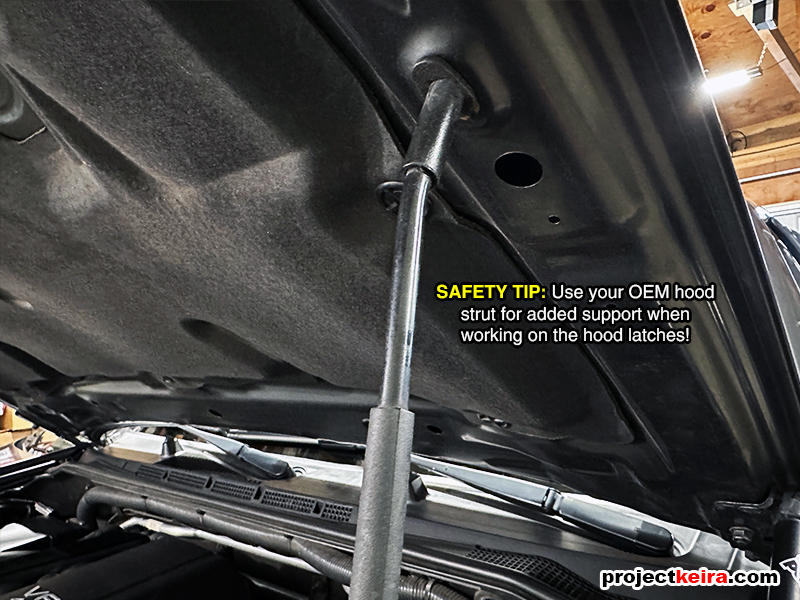
The swap was as straightforward as it gets; I replaced one side at a time, starting with the driver’s side. This let me use my OEM hood prop to hold the hood up while I swapped the brackets. The swap took me about 15 minutes for both sides (at a leisurely pace) and the only tools I needed was a 12mm socket (to swap the brackets) and a flathead screwdriver (to pop-out the locking clip for the hood struts).
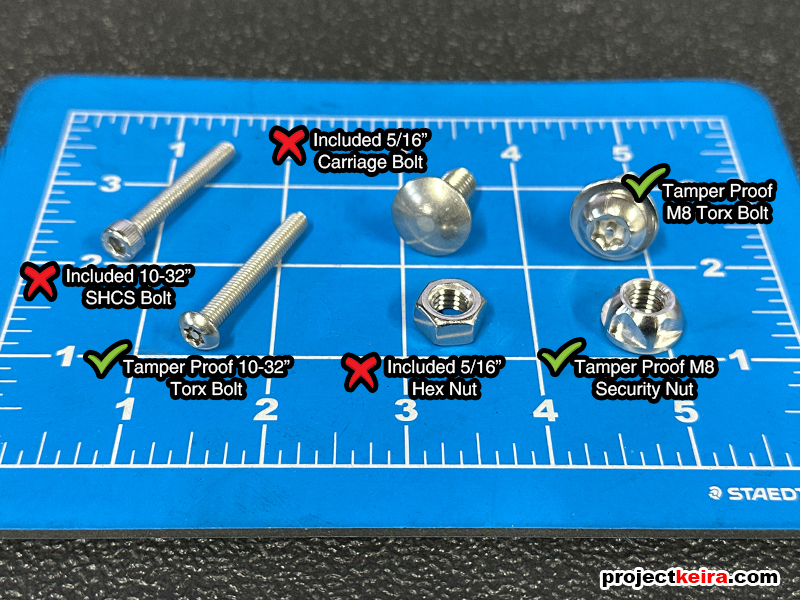
With the brackets installed and ready, I turned to the ditch lamps themselves. I was worried that due to the easily noticeable location of the lights, some shady people might get interest. So, before installing the lights I looked into some security options. After some CSI I decided to use tamper proof bolts: the ditch lamp-to-bracket bolt and the main bracket mounting carriage bolt was replaced with tamper-proof hardware:
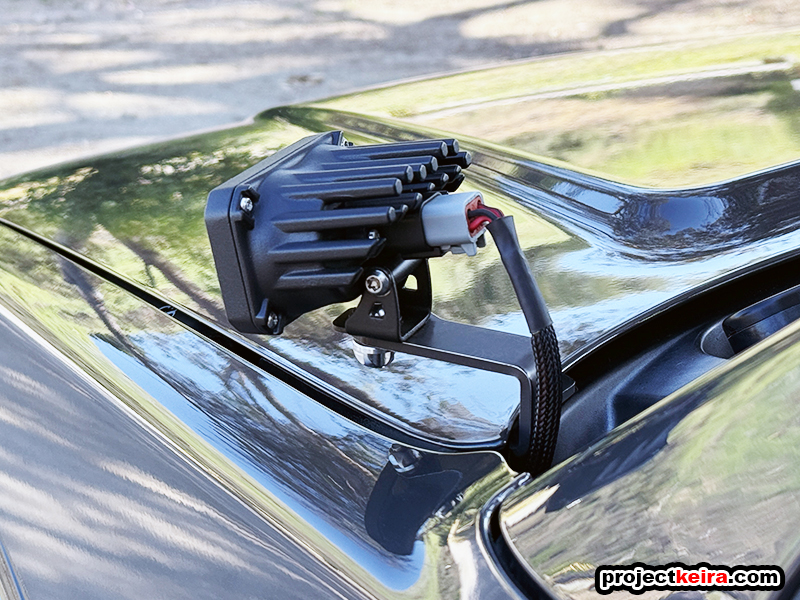
I know these aren’t 100% theft-proof, but neither are car alarms. I figure it’s enough of a deterrent to eliminate any opportunistic thief. I also made some harness extensions to make it plug-and-play under the hood (optional amber lens covers shown):
Going with the tamper proof bolts was the right move, as they were the perfect size and length to attach the Diode Dynamics bracket to the Z1 Ditch Lamp bracket:
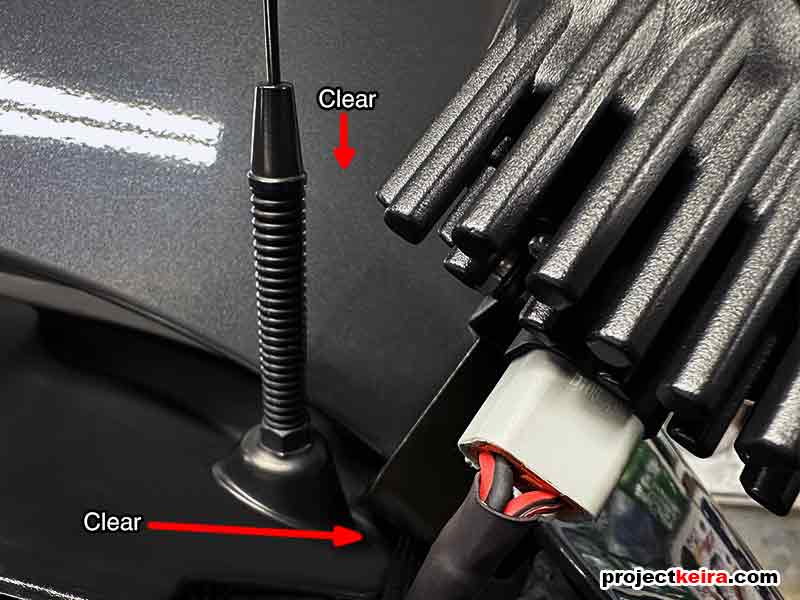
Installing the actual lights to the bracket was elementary at this point – I did have a slight concern about the passenger-side, as it looked like there was a possibility that the Diode Dynamics lamp would make contact with my antenna. However once the lights were bolted on, there was ample clearance and nothing to worry about:
With everything bolted down and wired up, here’s the final product:

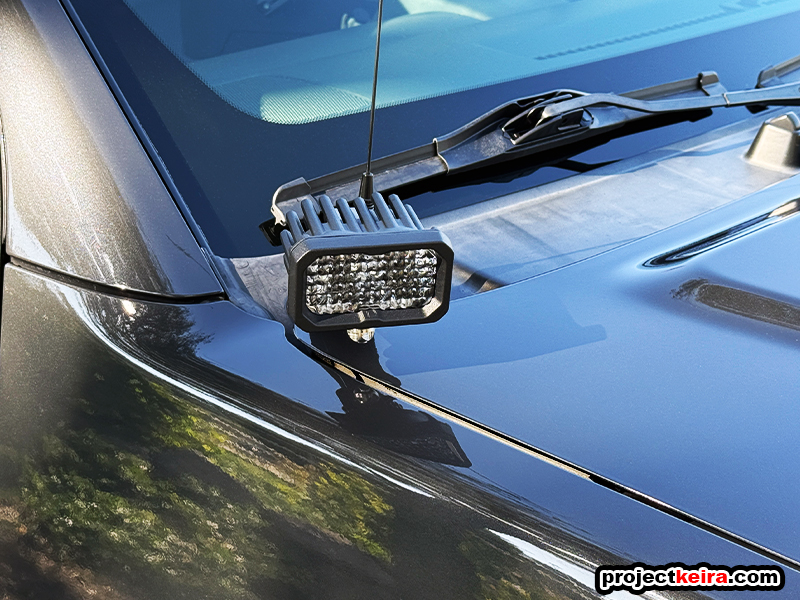
Not bad, not bad at all! I like how they aren’t too big to draw attention (*cough TRD people *cough) and I can easily remove them in a couple of minutes if needed.