How-To: Install OEM Nissan Rope Hooks (w/added Security)
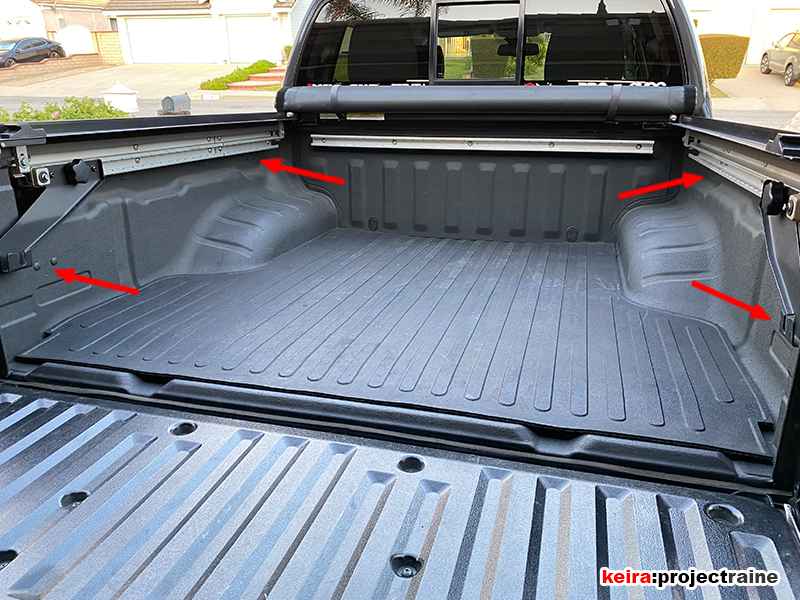
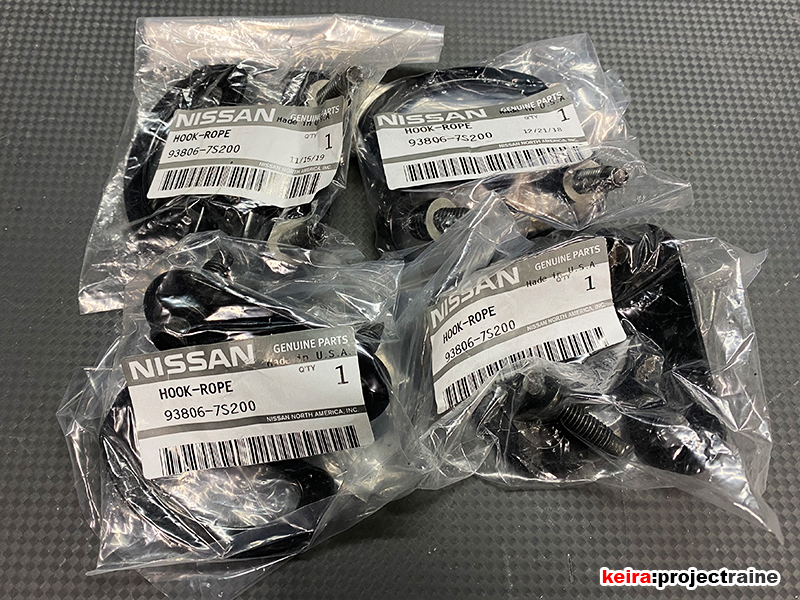
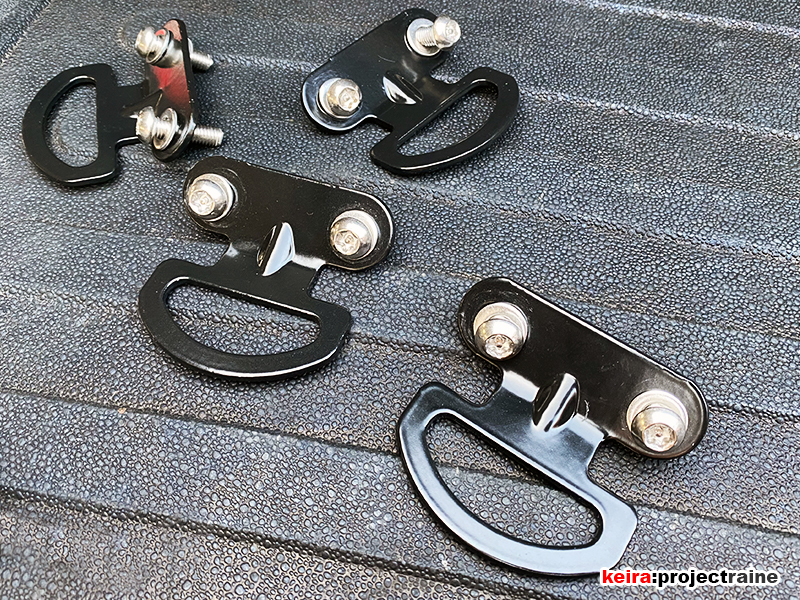
Recently I removed my RockyMounts DriveShaft SD bike mounts from the bed rail (due to switching to a hitch-mounted platform rack) and I realized that I now had nowhere to attach a padlock in the bed. Solution: It was time to order up a set of the OEM Nissan bed tie-downs / cargo hooks / bed loops / cargo eyelets (officially named “HOOK-ROPE”) for all four locations in the bed:
Since it’s been a while, I thought I’d do a simple How-To covering how I installed these rope hooks.
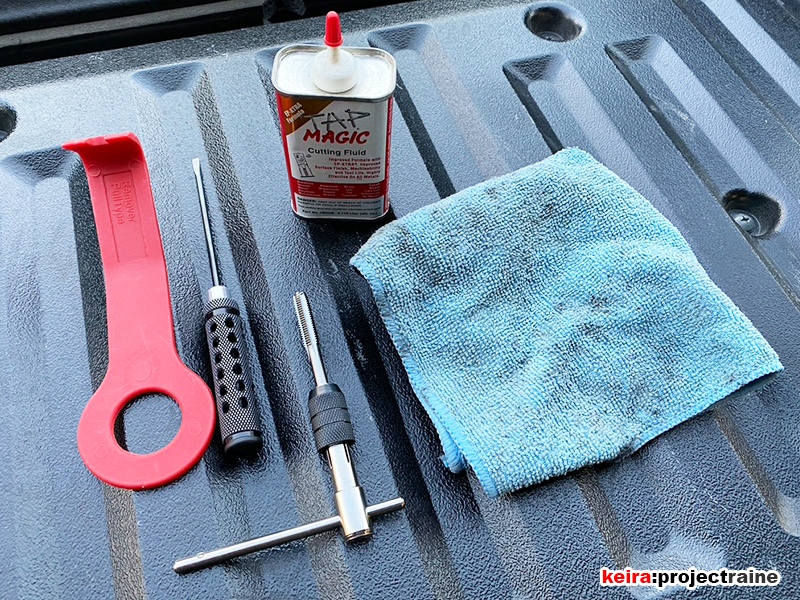
PARTS/TOOLS USED
Installation is very easy and should take less than 30 minutes, without rushing. It’s only 3 steps really, but the second step is the most important one to ensure success. I sourced the rope hooks directly from a Nissan dealer, Nissan OEM part #93806-7S200. You’ll need to buy four of them:
And for installation, I used the following tools:
- M8 x 1.25 Tap
- Flathead Screwdriver
- Body Panel Puller
- Tap Magic Cutting Fluid (optional)
- Rag (just in case, optional)
Extra stuff I used for my installation (more in these items later):
- M8 Tamper-Proof Stainless Steel Bolts (optional)
- Liquid Threadlock, Red (optional)
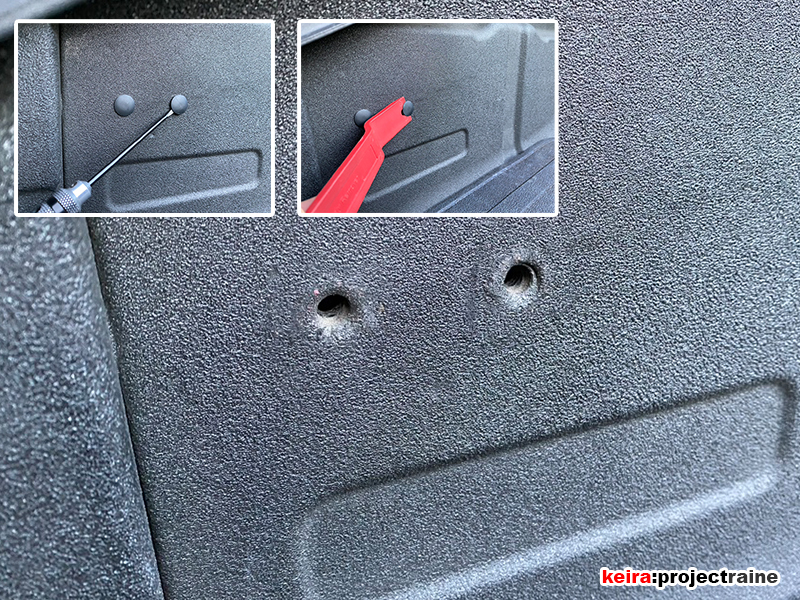
STEP 1 (above): Before installing, the first thing to do is remove the 8 plastic plugs in the bed that is covering the threaded holes. These are a PITA to get out, but with some patience, you can pull them out from the bed walls. I used a thin metal flathead screwdriver to work the edge up to get enough of a gap to slide my panel tool underneath so that I could pop the plugs out.

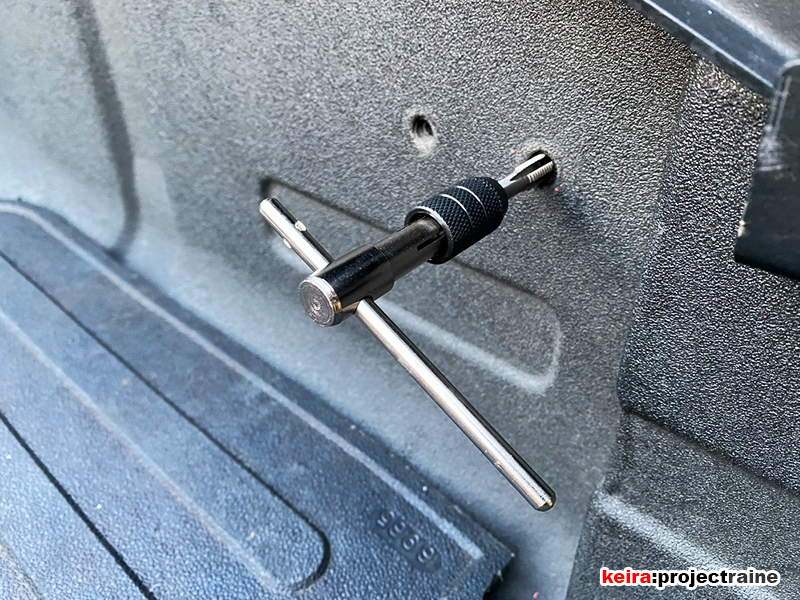
STEP 2 (above and below): This is probably the most important step to do with this install to ensure you don’t run into any problems – especially for those like me who have the OEM factory spray-in bedliner. The threads of the holes in the bed walls need to be cleaned up to ensure that the bolts thread straight and even; the last thing you want to happen is to cross-thread or even break a bolt! The threads can be easily cleaned up with an M8 x 1.25 thread tap. Simply thread the tap into the hole, then get going. I like to use the “turn ½ clockwise, back ¼, then ½ clockwise, etc.” method – use whatever thread tapping method you wish. Optionally I also used some Tap Magic cutting fluid to make the process much smoother and easier.
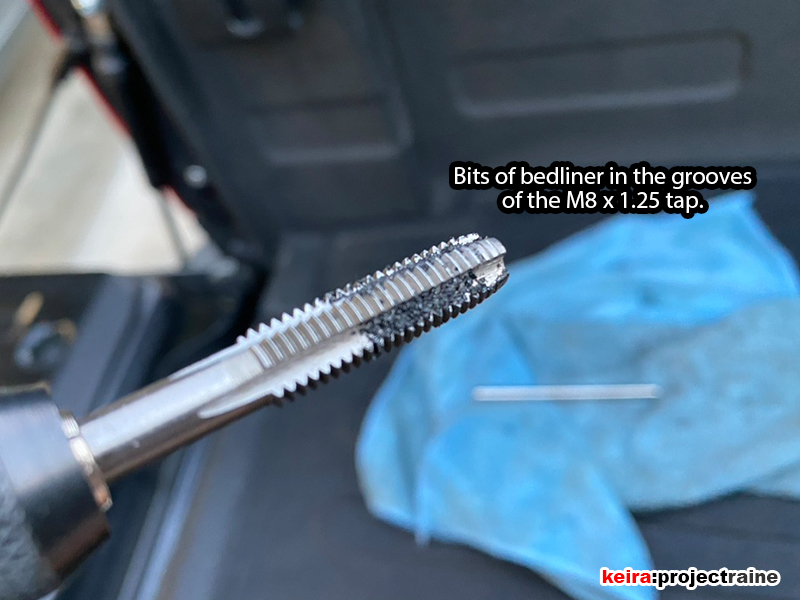
Take a look at the material that was removed from just one of the threaded holes:
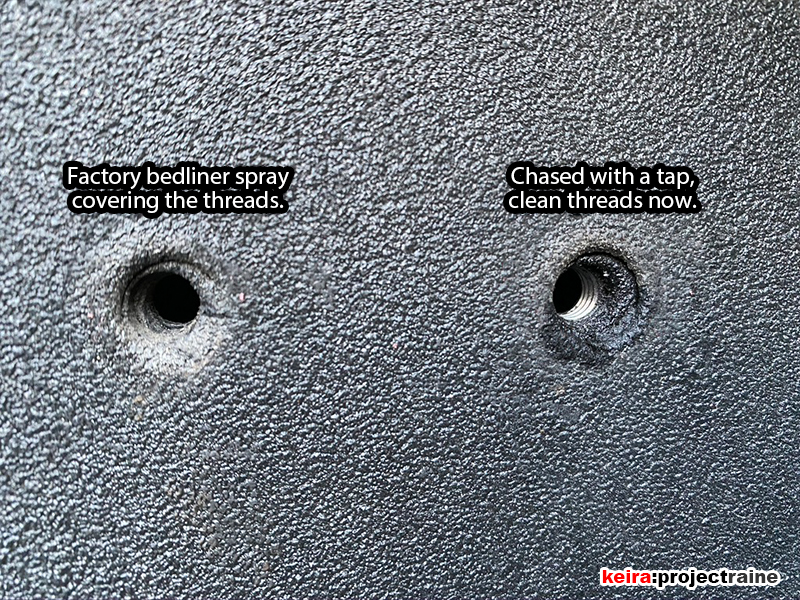
…and look at the difference between an untouched mounting hole and one that was cleaned up with the tap:
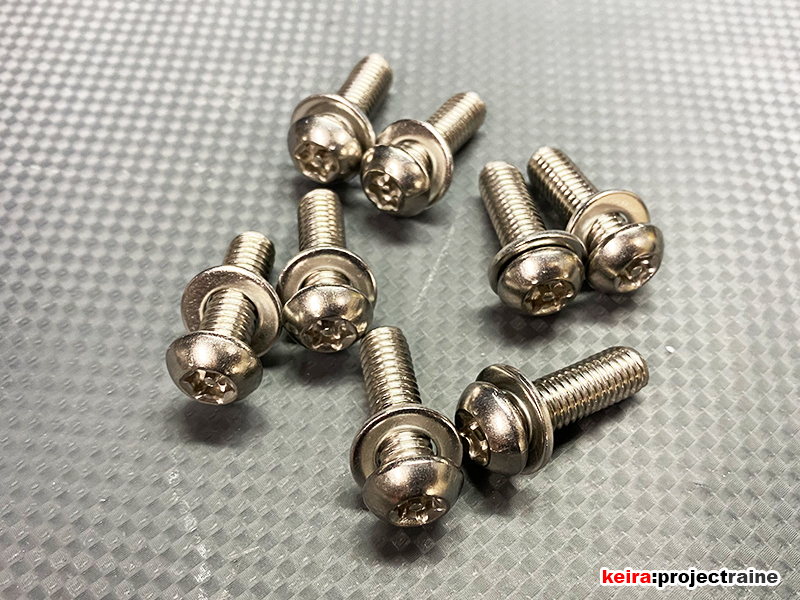
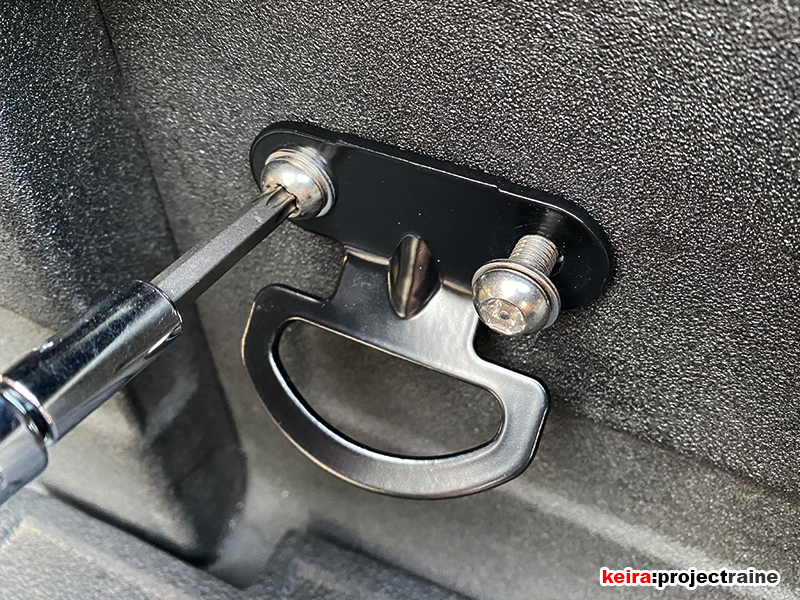
STEP 3: Last step already (it’s that easy) – time to install the rope hooks. Since my main purpose was to have something to use a padlock with, I decided to replace the OEM regular head bolts with Stainless Steel M8 Tamper-Proof Torx bolts so that some thief can’t just use a socket wrench to remove them:
From here, the rest of the installation is self-explanatory. To add more security, I also used the super-strong red threadlock on the bolt threads (forgot to take a photo of this part):
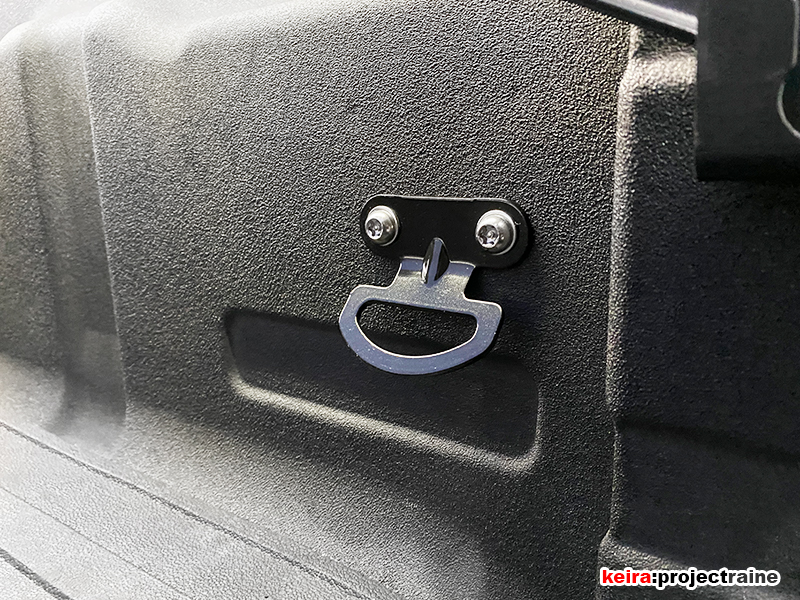
Note: If you have the Utilitrack rails, the two forward rope hooks have to be positioned with the hooks towards the bottom. However, the two rearward rope hooks can be positioned facing upward or downward; for me, since I’m mainly using the hooks for locking purposes (not to hold cargo down) I installed all 4 rope hooks facing downward. Here’s a photo of the final result (right-rear shown):
And that’s it. There’s not much more to say here, except that the install was a piece of cake and I’m happy now that I have a secure place to attach my cable locks when I need to use them.