Raising the Bars.
White Knuckle Rock Slider Install, Part 2 (See Part 1)
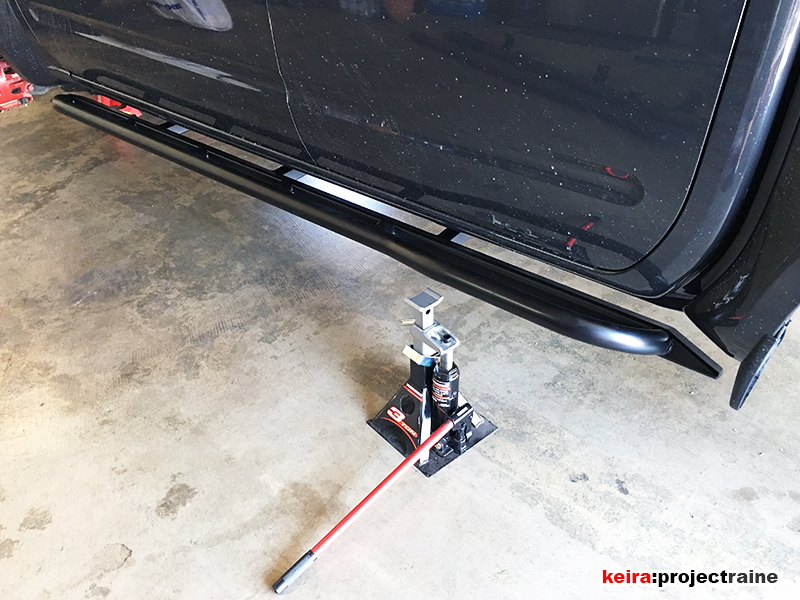
I had to wait until the following weekend to install the White Knuckle Rock Sliders after finishing the paint job. Step one was to figure out how to do the install by myself without any extra hands on deck. After surveying my garage for any assistance I found help in the form of a pair of adjustable pneumatic shop chairs. I already had the truck up on jack stands (for a planned tire rotation) and with the sliders on top of the shop chairs, everything was easy to maneuver. The rolling chairs made positioning the sliders under the truck much easier than using jack stands, and the pneumatic seat height feature let me raise the height of the sliders simply by tapping on the chair handles – all while laying on my back under the truck watching to make sure the sliders were aligned/placed perfectly into position.
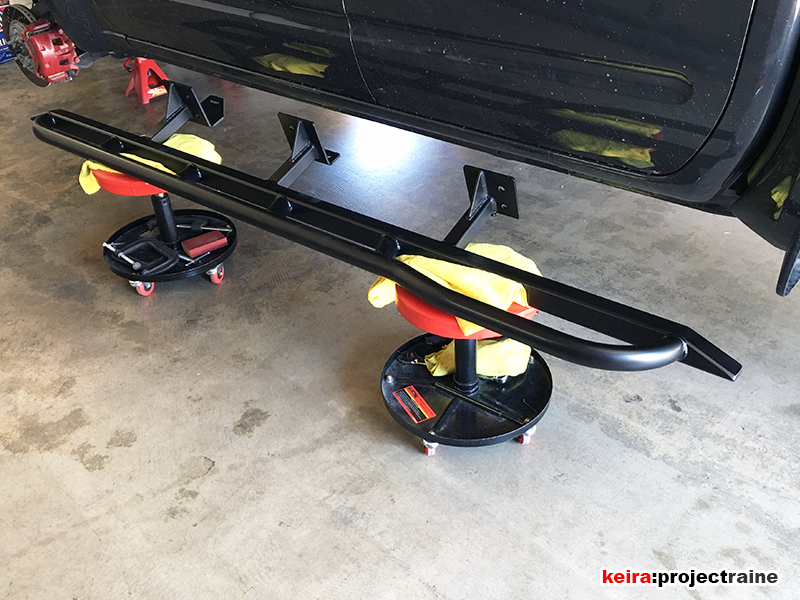
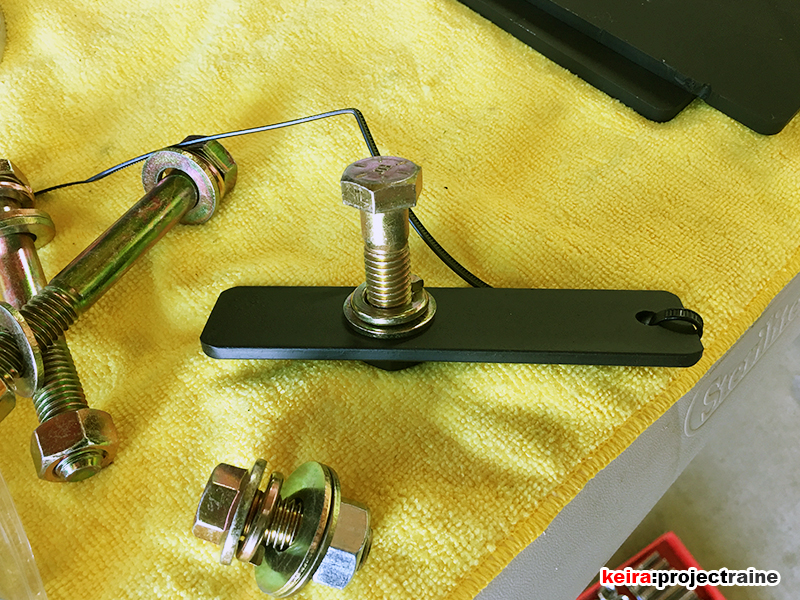
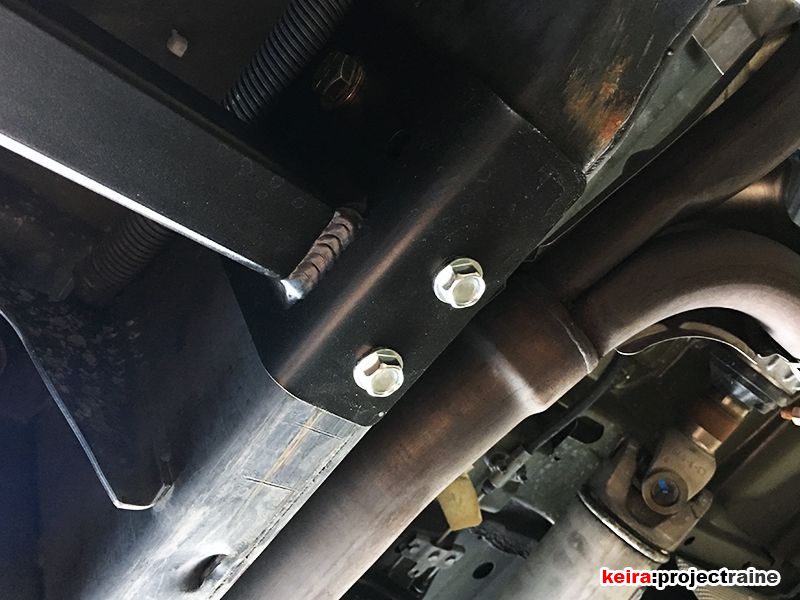
The bolt-on part was very easy… White Knuckle provides grade-8 hardware and thick, heavy steel support plates for the front and center brackets, and the Frontier frame had holes for these large bolts. The only thing that took long was the rear main bolts. These bolts threaded into a thin bar with a welded nut, and you have to slip the bar inside the frame rail from a small slot at the bottom. It took a few tries using some needle-nosed pliers before I got the bolt threaded in.
I finished both sides, each slider was attached now using 4 large bolts and 3 nuts + 1 “bar nut” at the rear. I was at the halfway point now.
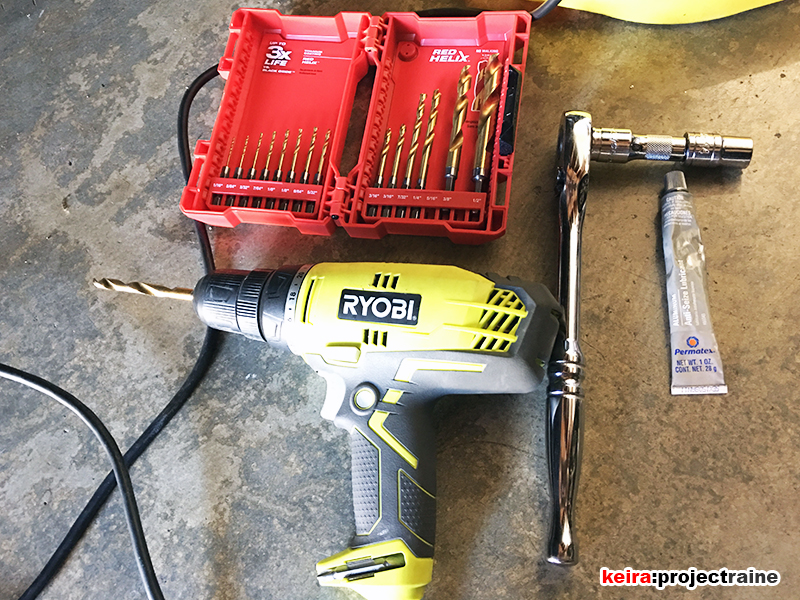
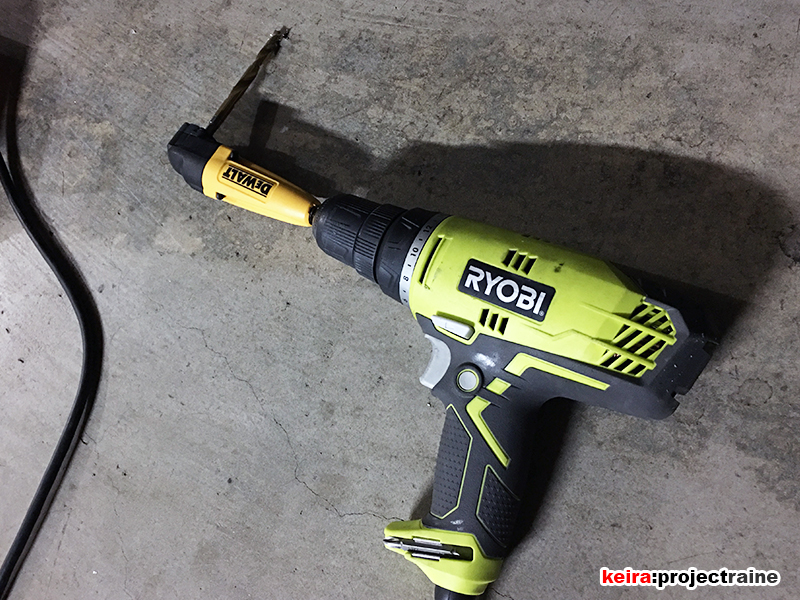
The other half required drilling 6 new holes in the frame for 6 more bolts. The sliders were already pretty secure with just the main hardware, but I wanted full strength so I had to drill. Contrary to what a lot of people think, drilling into the frame to mount these sliders isn’t hard at all. I used the following tools:
- Basic $29 Ryobi Adjustable Torque Drill
- Milwaukee Helix Titanium Drill Bits
- Dewalt Right Angle Adapter
- 1/2-inch Drive Ratchet
- Short Drive Extension
- 14mm socket
- Small Tube of Anti-seize
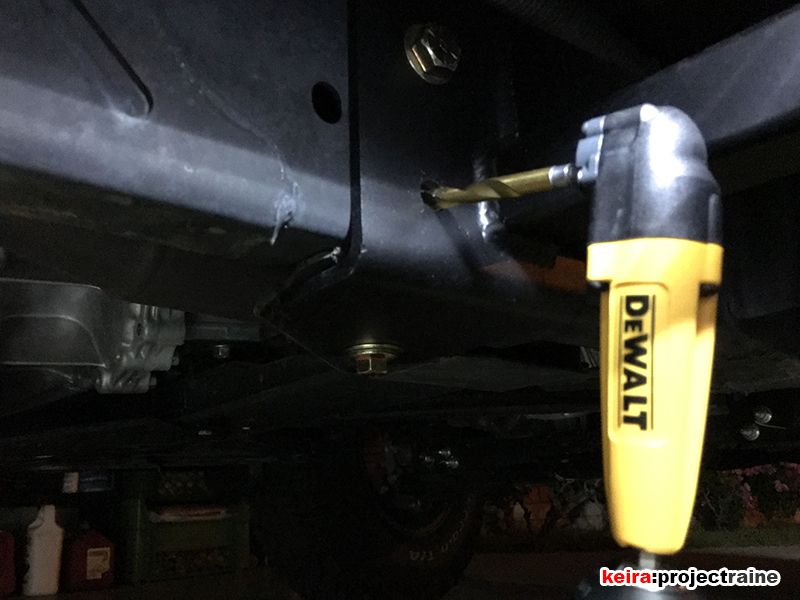
Instead of following the instructions word for word (which suggested using a drill bit, center punch, then another 3 drill bits) I came up with a different method. First, to mark the center where I needed to drill, I used a 3/4-inch drill bit. The 3/4-inch bit fit perfectly into the slider bracket slot, so I barely drilled just enough to indent the frame rail – this gave me a coned mark that was perfectly centered:
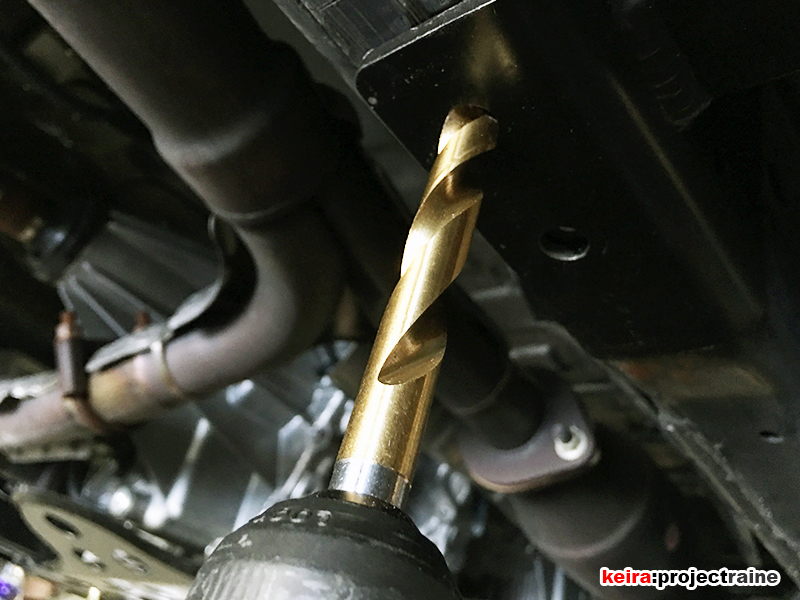
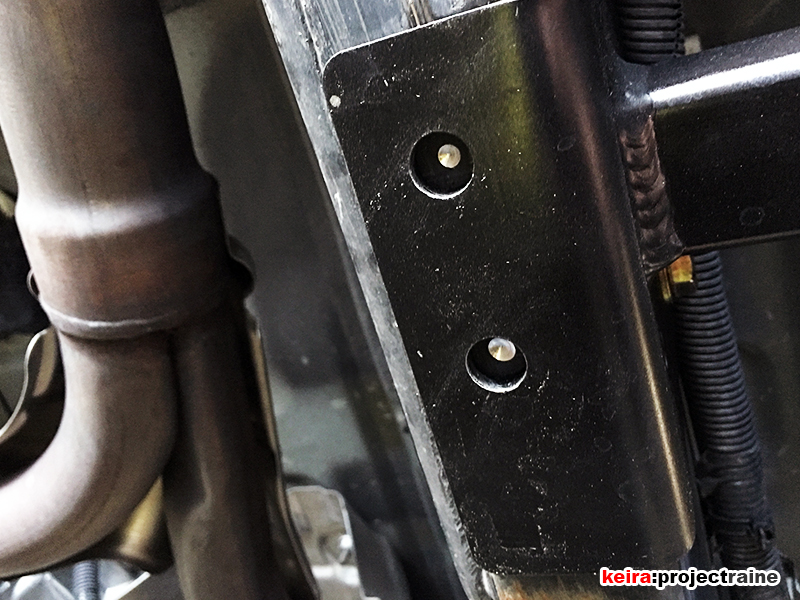
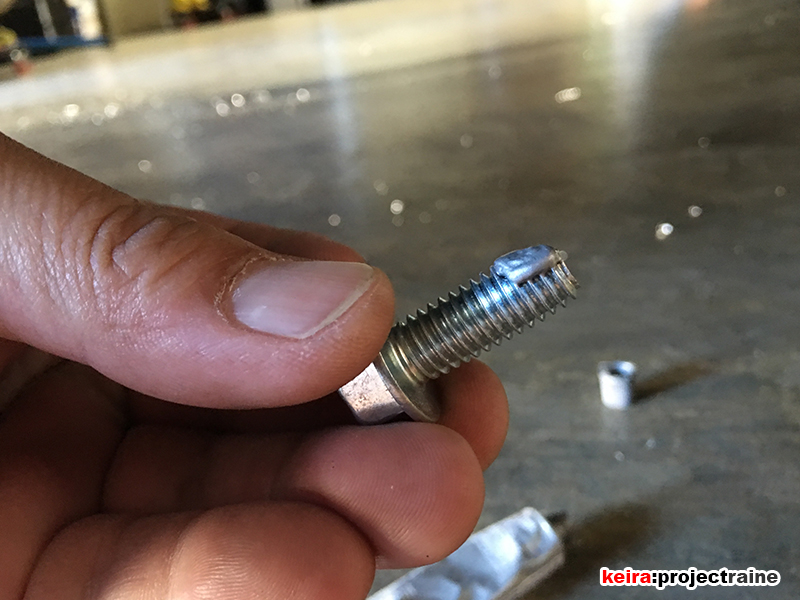
From there, I went straight to the required 5/16-inch drill bit, and thanks to the indents I made, I completing drilling the 3 underside holes in no time. I then wiped away any metal fragments, and put a dab of anti-seize on the self-threading bolts which allowed the bolts to easily thread into place:
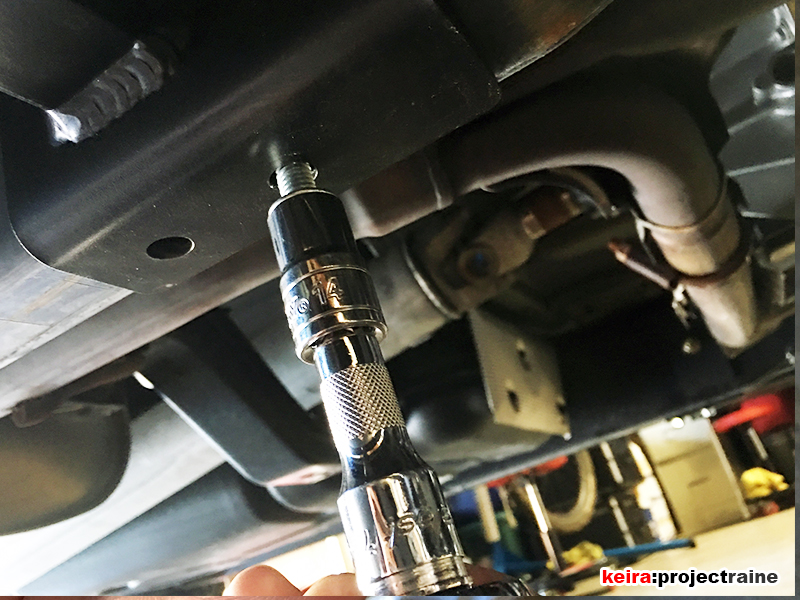
With the underside bolts done, the last part of the install was the 3 side bolts. The instructions said to mark the hole positions, remove the slider (because there’s no room between the outer slider rail and the bracket to fit a drill), drill the holes, then reattach the slider. I did not want to remove the sliders because 1) they’re heavy and removing them would be time consuming, and 2) there had to be a way for me to get the side holes drilled with the sliders in place. Looking through my toolbox, I found the solution – a Dewalt right angle adapter! I had ample clearance to drill the final 3 holes with the sliders in place.
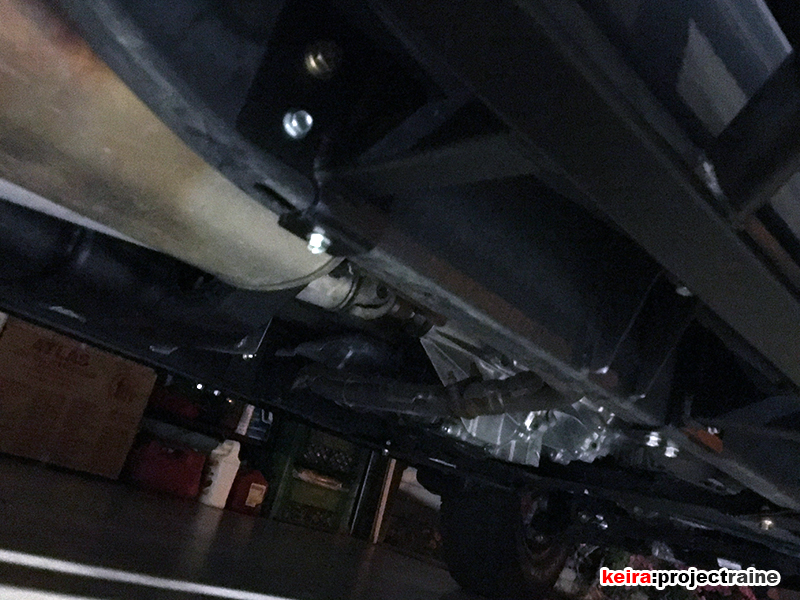
The slider installation was 99% complete, but there was still one final touch I needed to add. CONTINUE TO PART 3.