Where’s That GIAA Going?
YouTube is amazing. Amongst the thousands of videos one can watch featuring iJustine, Project Farm, My Mechanics, Being The Elite, Ronny Dahl, FortNine, EMBN, and so on and so on… sometimes one day you just see something and just like that the gears start turning for a new mod! Some time ago I was watching a video where someone had a tablet mounted on the dash of their Jeep. It was this obnoxious-looking, giant RAM Mount mounting arm (with equally huge tablet holder) that was bolted dead center on the center stack… painfully obvious and something that would always be there whether you wanted it to be or not. What I did like though was the fact that they had an auxilliary large screen (much larger than any Double-DIN head unit or any normal phone) for displaying map info within arm’s reach. Coincidentally, as if it were fate (LOL) a few days before I saw that video I just so happened to buy a new 2021 Apple iPad Pro M1, the cellular version (with the GPS chip).
When I went to Cleghorn a few months ago I had the luxury of being able to have GIAA GPS show on my head unit’s HD screen via Carplay, albeit with a lot of pinching, zooming, and scrolling due to being limited to a 6.95″ screen size that in reality is just barely larger than my smartphone display (iPhone 12 Pro at 6.1″). With that in mind, I started brainstorming how I would mount my iPad Pro with its larger 11″ screen. First, I did a quick Photoshop visual of the first idea/iteration:
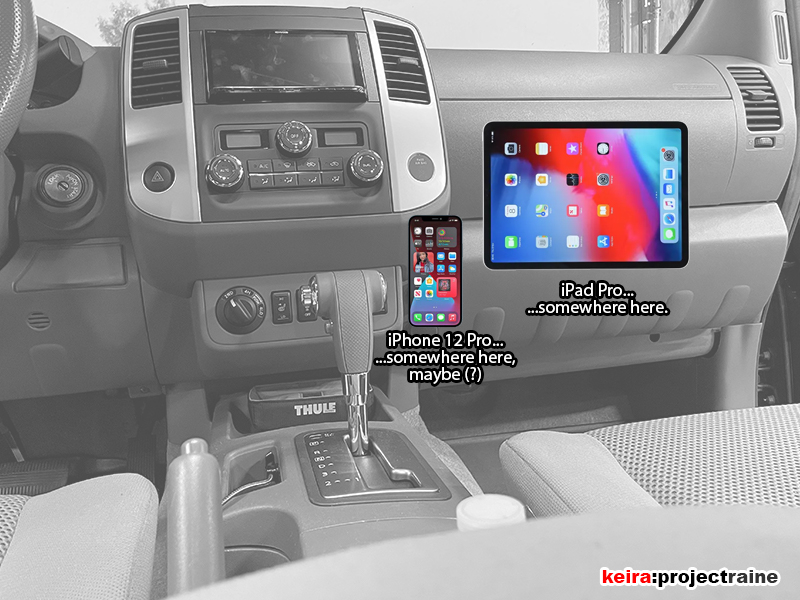
Initially, I was imagining having both my iPhone and my iPad mounted in the positions shown above, so I went about taking measurements for something floor-mounted:

I even went ahead and bought the RAM Mounts “No Drill” mounting base that was specifically designed for the Nissan Frontier… but then after a test-fit the setup reminded me of how that Jeep person on YouTube had their permanently mounted, giant metal arm and tablet holder sticking out from the dash. If I went down this current path, I would also end up with a permanently mounted, giant metal bracket bolted down on my floor with a metal arm and tablet holder sticking upward. Sure, if this was my OVH rig and I was off-roading every weekend, it would be perfect; but no, my truck is my daily driver, and I don’t want something permanently visible when I’m not using it. For my purposes, I would need to come up with a better solution.
So – requirement #1: I would need something that’s solid like a floor mount, but removable and easy to re-install when it’s time to hit some dirt. Requirement #2: For security purposes, I did not want to have a very noticeable, always visible tablet mount just there on my dashboard in plain sight. If some potential thief walks past my truck and sees a tablet mount bolted onto the dashboard, the potential thief might think that I just hid the tablet somewhere in the vehicle, so they might try and break in anyways. Without any visible mount, my dash looks as plain as a stock Frontier.
This is when I came up with the idea to have some sort of mounting arm that would come out from the upper glove box in order to hold my iPad, then when I don’t need it I could tuck the arm away inside the upper glove box, close the lid, and the mount would be out of sight. With a new mod plan, the first thing I had to buy was a spare upper glove box. Whenever I mod OEM parts, I always like buying a new OEM spare so that I can reverse any mods I’ve done (or if it doesn’t work out, or I make a mistake). In this case, my original glove box is perfectly mint, so I looked for a second upper glove box in order to experiment. After a few days of searching, I came across a nice-looking used upper glove box on eBay with a $60 asking price, and (more importantly) the option to “make an offer:”
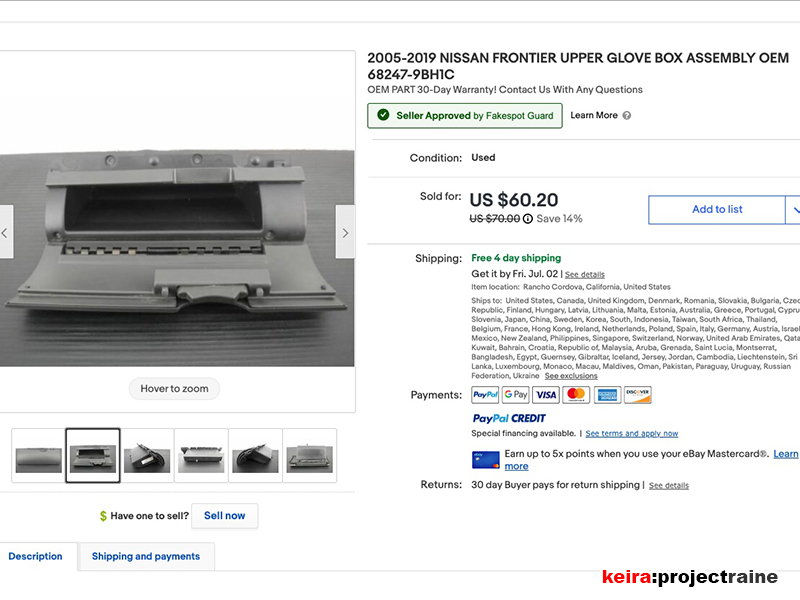
After some back and forth, the seller agreed to a sale for $50 shipped (way better than a brand new OEM upper glove box priced at $287!). Within a week it arrived, and a quick disassembly and cleaning resulted in a glove box that looked very good:

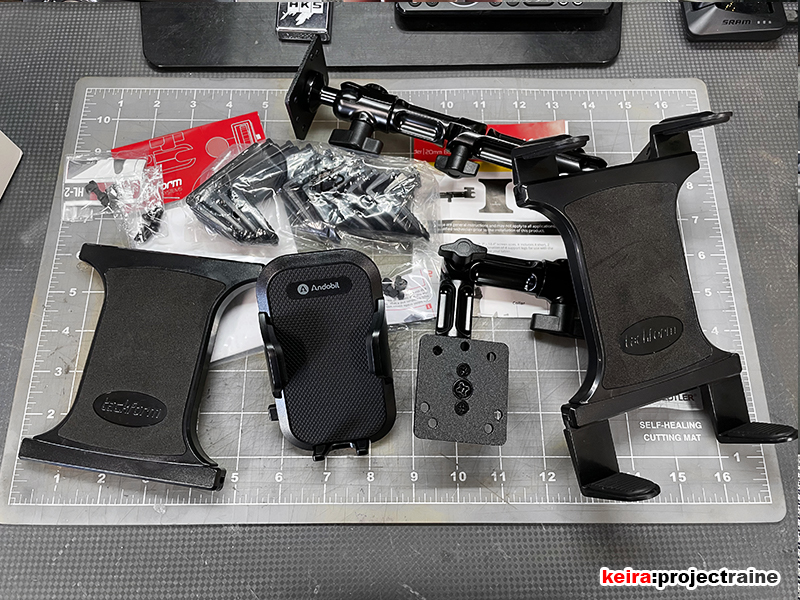
After a couple of days of Amazon CSI looking at all of the available tablet mounting products they had to offer, I decided to use the Tackform Enduro Series tablet mount as the basis for this mod. I ordered two of them for experimental purposes, as well as a phone mount (that I would later not use after all):

Random: if you ever wondered what the upper glove box would look like without the face cover, it looks like this:

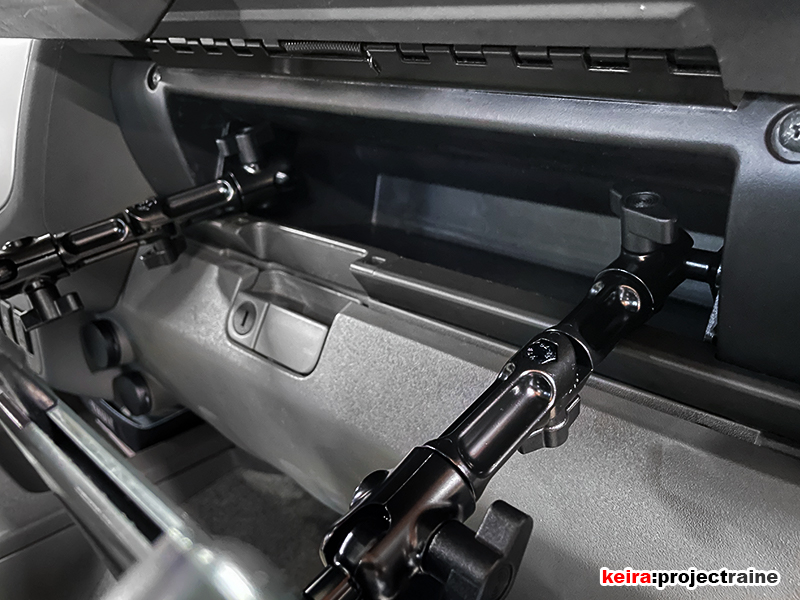
Anyhow, back to the mod. The next portion was a whole bunch of trial-and-error; using heavy-duty double-sided tape allowed me to temporarily attach the metal arms to the glove box so that I could test the arm location mounting point. First, at my workbench I would stick the mounting bases somewhere in the glove box. Next, I’d go to the passenger side of my truck to bolt in the spare glove box. Then I would guestimate and adjust the mounting arm angles and their final positions. Finally, I’d walk around to the driver’s side, get into the driver’s seat, pop my iPad into the mount, and see how I liked it. Here are a few pics during that process:


As I was repeating this trial-and-error fitment process over and over, I realized that I wouldn’t need the phone mount. At the same time, I still had a pair of adjustable arms to play with so I modified the plan on the fly and decided I was going to use the second arm for my Baofeng UV-5RTP GMRS radio instead. Instead of going full DIY with the radio mount, I bought a Rugged Radios metal radio bracket. The bracket was just the metal part, but I did a few mods to it for my purpose:

I added some foam padding so that the Baofeng UV-5R would clip snug onto the bracket and stay in place. Next, I attached a 20mm ball base on the back of the bracket; this 20mm ball would let me attach this bracket to the Tackform arms. Finally, I secured my Commountain speaker-mic to the bracket with a pair of zip ties, the result was this:
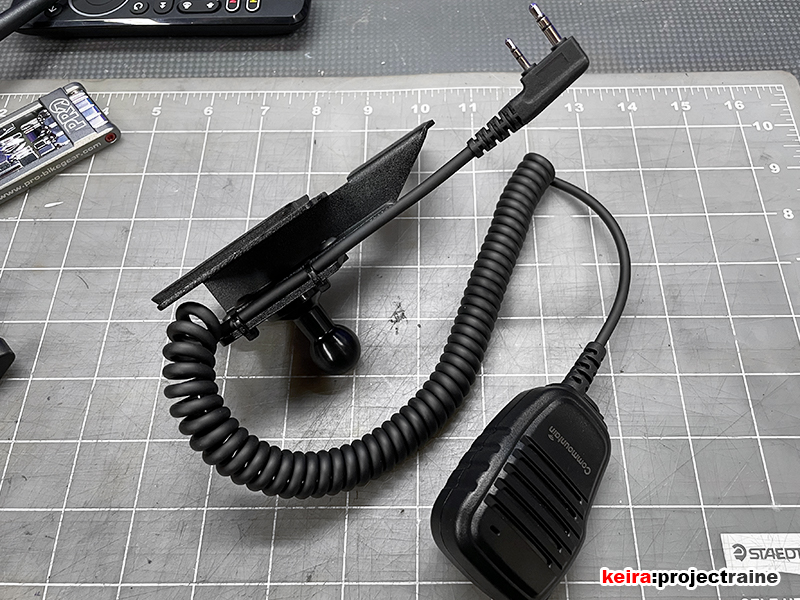
…and another test fitment pic shows where I was going with this bracket:

What it looks like with the UV-5R:

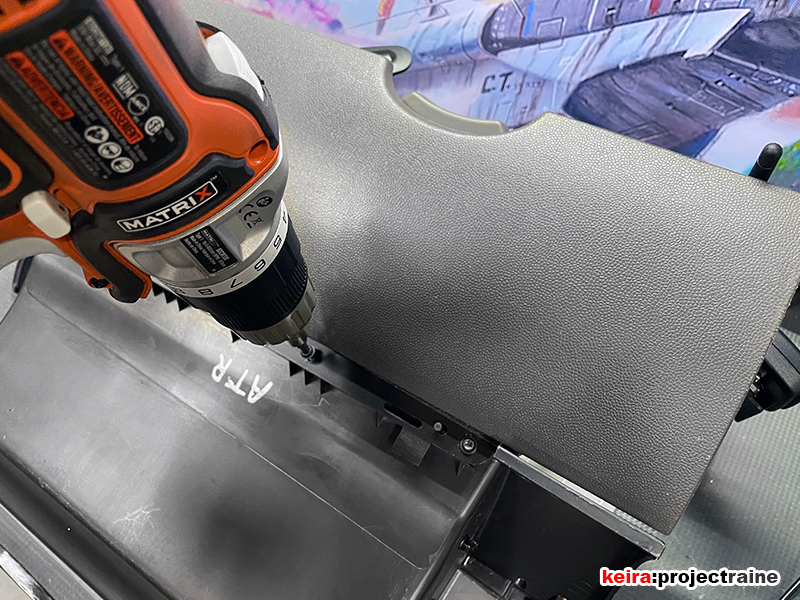
Back to the main part of the mod: once I figured out the final mounting positions for the arms, I marked the location of the base plates and drilled the mounting holes:

The upper glove box was tiny when it came to tool clearance, but not a problem because since I used metric hex hardware, I could use one of my various mountain biking multitools to help secure the ball mounts in place inside the glove box:

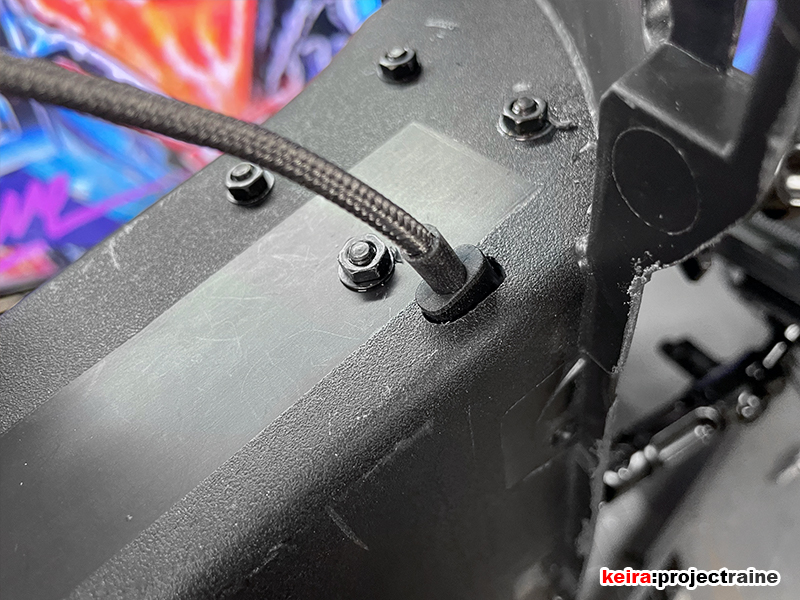
I also notched a small hole in order to slide an Anker USB-C reinforced cable through it, to provide power to the iPad Pro:

Back to the cover – in a photo above I showed that I removed the face cover of the spare upper glove box to see what was inside. Instead of trying to glue it back together, I just removed my original glove box cover and bolted that onto the modified glove box housing:
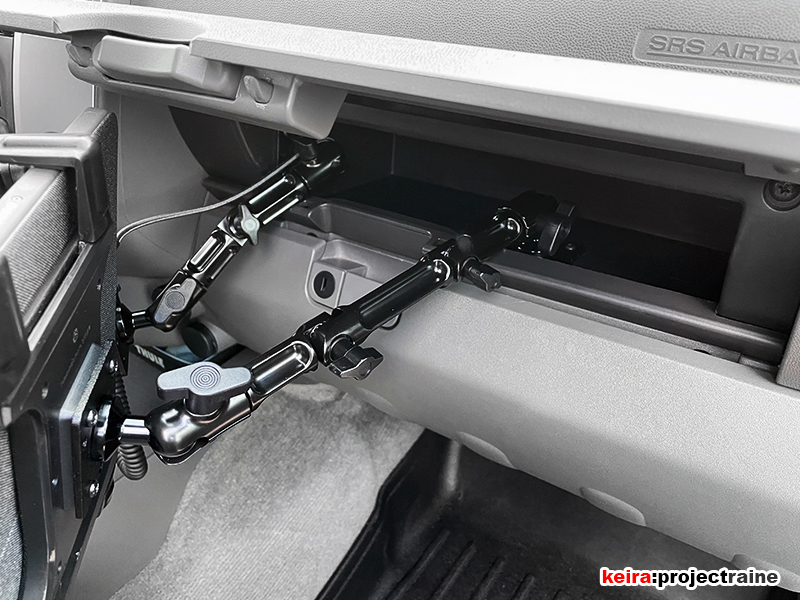
After a long evening in the garage, the result of a day’s worth of garage modding ended up looking like this:

The next afternoon, I took some test drives around town with the iPad mounted, and every so often I’d pull over so I could readjust the arms and play with the positioning a little more. By the end of that drive I had the speakermic and iPad Pro closer to the center console:

When I’m done using the mounting arms, I can easily tuck them into the upper glove box; the only parts I really have to detach is the main iPad holder and the radio bracket, and it only takes seconds to remove and store them for use later:


Both the iPad Pro and the GMRS radio are well within reach of my right hand without requiring me to stretch and/or lean over to the right just to get to them. This should work great when I get to the dirt. Even with the iPad Pro at this distance, the FaceID feature still works so I can simply swipe up on the screen to unlock it without trying to tap in an unlock code. As for the radio setup, the speaker-mic is very conveniently positioned in a secure place (not sitting free on my passenger seat like before!) Another detail to note is that I can still open the lower glove box with everything in place, as the arms are positioned to not interfere with the lower glove box door. All turned out well, I’d say mission accomplished!

Bonus: I tried a vertical orientation for the iPad Pro and moved the radio position higher up near the head unit, both adjustments moved both items even closer to me:

So there’s the mod for now. Go figure – as soon as I finished this mod, I saw this and the gears started turning again:
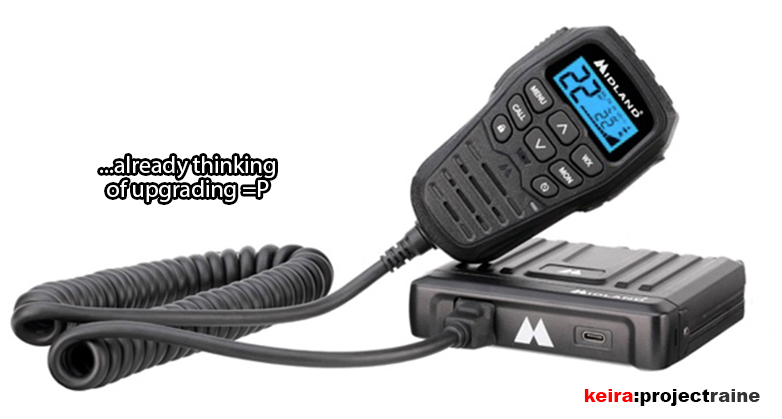
…but we’ll save this idea for another day.