Beam Me Up: Auxbeam 8-Gang Switch Panel
It took 3 seconds to order this on Amazon.com but over 3 months before I got around to installing it, after 3 weeks of first revising/rewiring the bulk of my truck’s electronic accessories (not including the audio equipment). What’s with the number 3? Nothing, it’s just coincidence… but anyhow here it is – the next mod, the Auxbeam dedicated controller (8-gang version in blue):

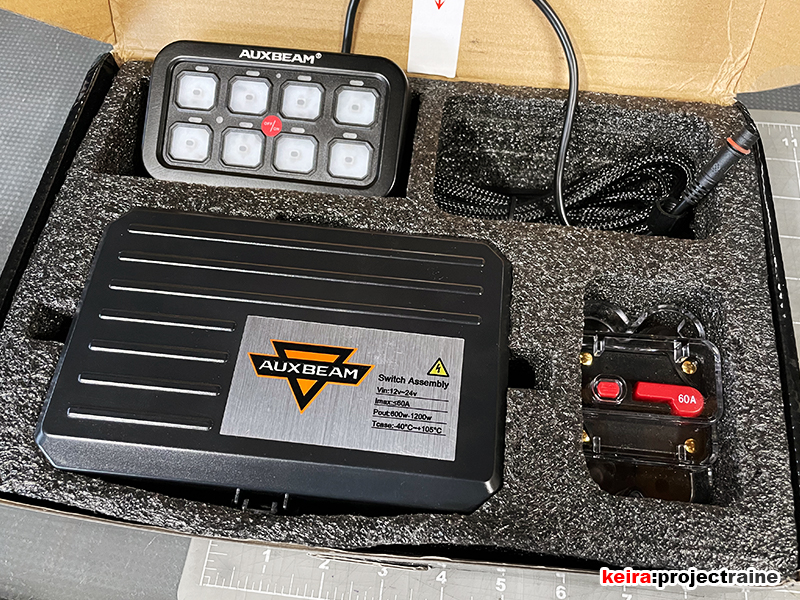
Here’s what comes in the box… the control panel was a lot nicer than I had expected, with a metal casing and soft-touch membrane buttons. The included circuit breaker will not be used:
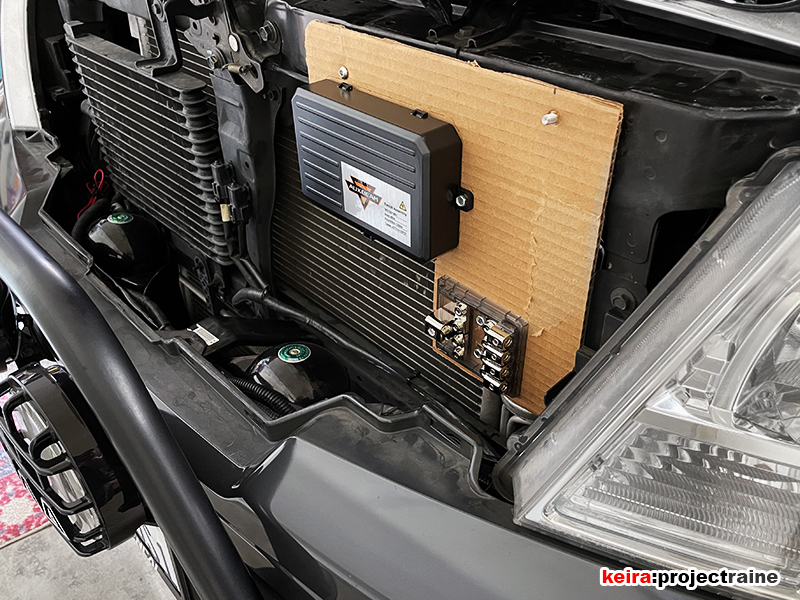
It took a while for me to decide where to mount the main relay module under the hood. I tried finding a location on the left side of the engine bay but there wasn’t any accessible room. I didn’t want to put the module where my original Blue Sea fuse block was either since part of this mod was to reduce overall wire length. Finally, after some brainstorming, I found a spot just behind the grille, on the left side next to the left headlamp. I used some cardboard to mock-up a mounting plate first to see if it would work – and there was enough room after all! This spot used to be where I mounted the Mitsuba horns, which in the photo below can now be seen relocated down lower behind the bumper cover (and closer to the ground to radiate more sound):

Here’s the new main fuse holder, mounted in a discrete location next to the battery:

Only 1 “extra” cable attached to the battery post now (there used to be 3!):

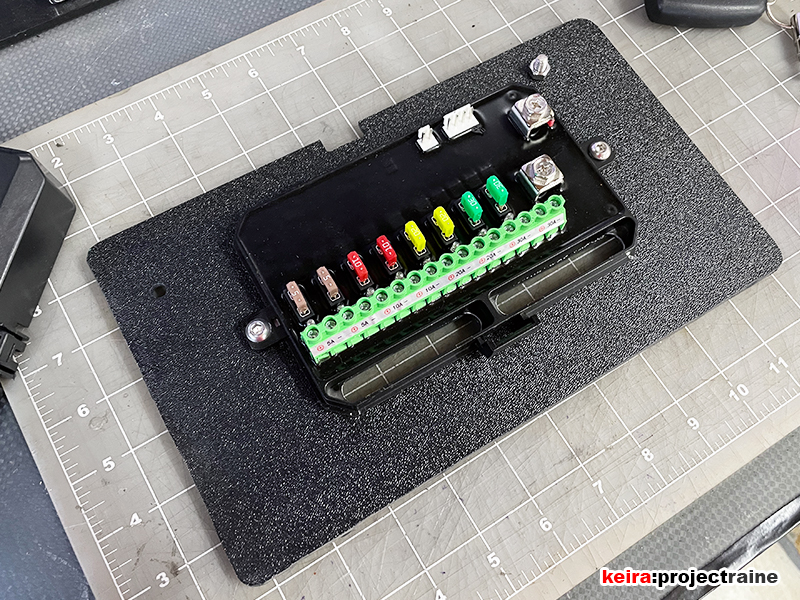
New EFX 4-way distribution block mounted on a custom panel, right in front of the OEM air filter box:

Deutsch DT Series Connectors used for organization and cleaner connections:

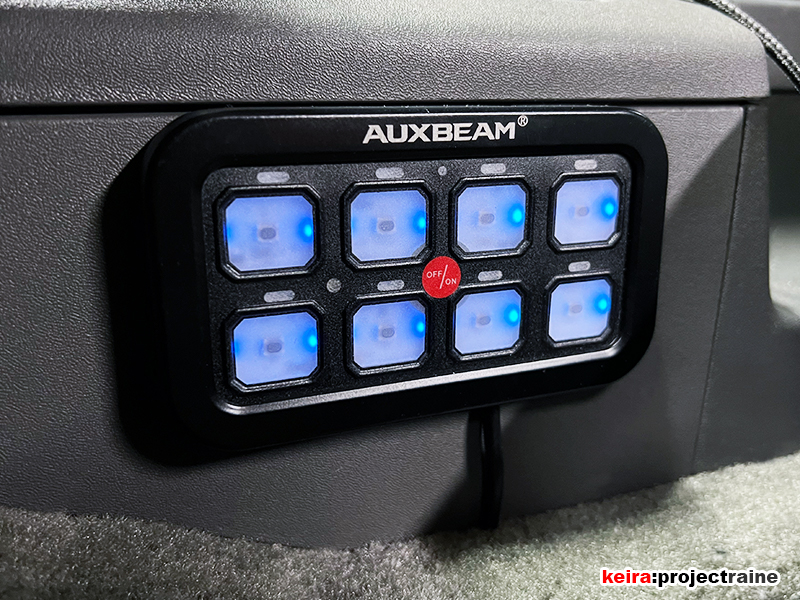
Here’s the Auxbeam control panel mounted to the side of the center console in the interior. This will stay here for now, I don’t mind it being a little non-visible since it draws less attention from parking lot passers-by.
So after a long 3 weeks in total revising the wiring after hours (I usually went into the garage around 10 pm and did whatever I could until I felt like it), I finally finished the re-wiring project and the end result was fewer wires, a much cleaner engine bay, and an easier path to adding more electronics in the future. I’ll think about how to create custom labels for the buttons, but that’s for another day (and another project!) That said, mission: accomplished!
- Installed new InstallGear main fuse holder
- Installed new EFX 4-way distribution block to chassis with custom mounting plate
- Installed new 2-AWG main power cable
- Installed new 8-AWG power cable to the interior
- Connected existing 4-AWG power cable from Alpine PDX-V9 amp to EFX
- Connected power cable for Auxbeam relay module
- Installed new interior-mounted Blue Sea Systems fuse block with custom mounting plate
- Connected power cable from Blue Sea to JL Audio TWK-88 DSP
- Connected power cables from Blue Sea to Soundstream rear amp
- Installed control wire for Auxbeam relay module
- Soldered diode harness for OEM integration
- Installed new Speedwire from left side engine bay through firewall (interior)
- Installed new Speedwire in left door sill from A-pillar to C-pillar
- Assembled Auxbeam channel 1-4 DT plug harness
- Assembled Auxbeam channel 5-7 DT plug harness
- Assembled Auxbeam channel 8 + trigger wire DT plug harness
- Assembled DT plug harness to Rigid Industries and PIAA lamps
- Assembled DT plug harness to King LEDs, floor LEDs, and bed LEDs
- Assembled DT plug harness for future channel 3, 4, and 8
- Created DT harness for future dashcam integration
- Triple-checked all wiring connections before power-on
- Installed Auxbeam switch panel and connected panel to relay module
- Tested all functions (woohoo!)
- Reinstalled grill, all interior trim
The Auxbeam install was just part of a larger revision/re-wiring job. I did not remove any accessories but at the same time, now I am ready to add a few more with zero issues thanks to the centralized Auxbeam relay module and the DT plugs I have ready when need them. The wiring is now pretty simple and much more organized. This was a long but really satisfying project, I am happy with the results!