How-To: Swap Frontier Fog Lamps
When I installed my Morimoto XB Series Type-S LED Projector Fog Lamps I also wrote a how-to in swapping fog lamps. This can also be used as a reference to install any fog lamp in the 2009+ one-piece plastic Frontier bumper.
TOOLS/PARTS USED
- Phillips Screwdriver
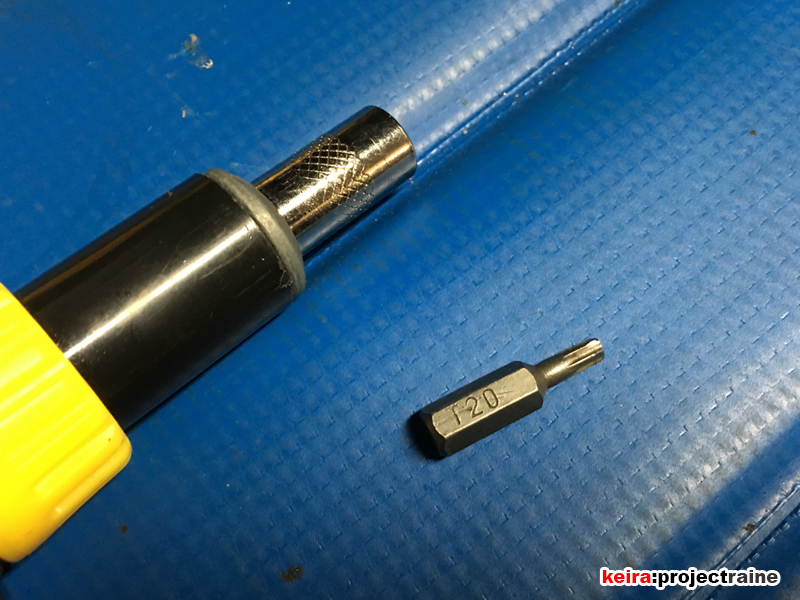
- T20 Torx bit (and handle)
- Masking Tape (optional but recommended, I prefer ScotchBlue)
- Sharpie Pen (optional)
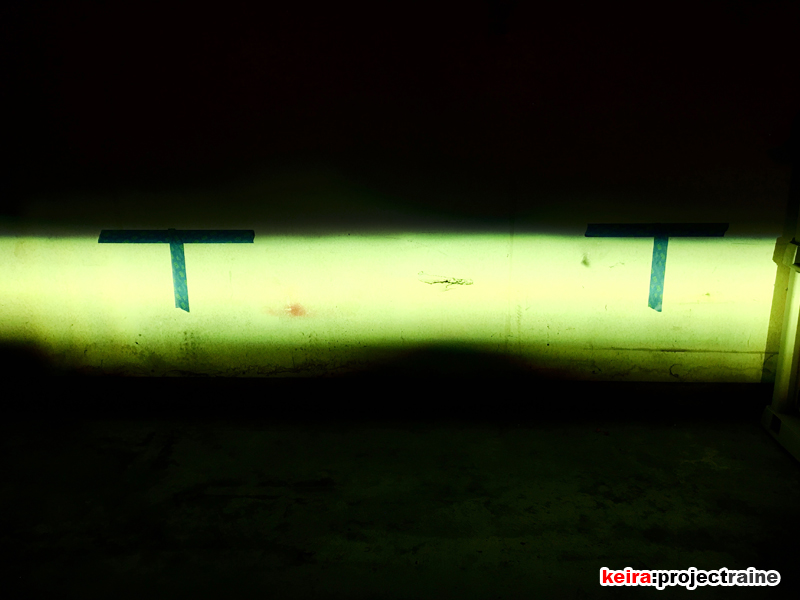
STEP 1: Find yourself a nice, flat wall (I cleared out part of my garage just to do this!) and park your truck perpendicular to the wall at minimum 15-feet. Some places will tell you to do 25-feet, but this will get you close enough without having to go out of your way to find a wall with 25-feet of clearance next to it.
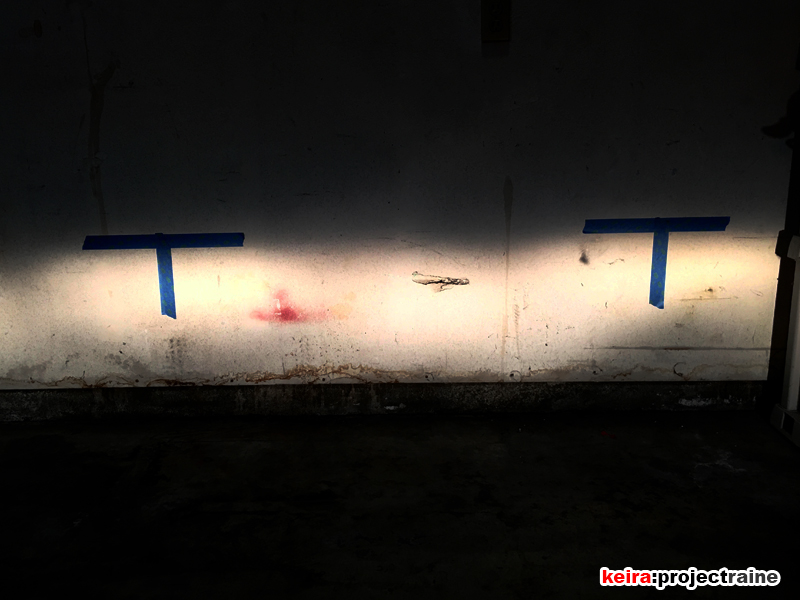
Next, isolate the fog lamps; since I don’t have the fog lamp mod, the fastest/easiest way I found was to simply unplug the headlamps at the connector behind the headlamp bulbs. Turn the fog lamps on, and put a piece of masking tape horizontally to mark the upper edge of each OEM fog lamp position. Then place another piece of masking tape vertically to mark the center of the hot spot for each fog lamp. Turn off the lights.
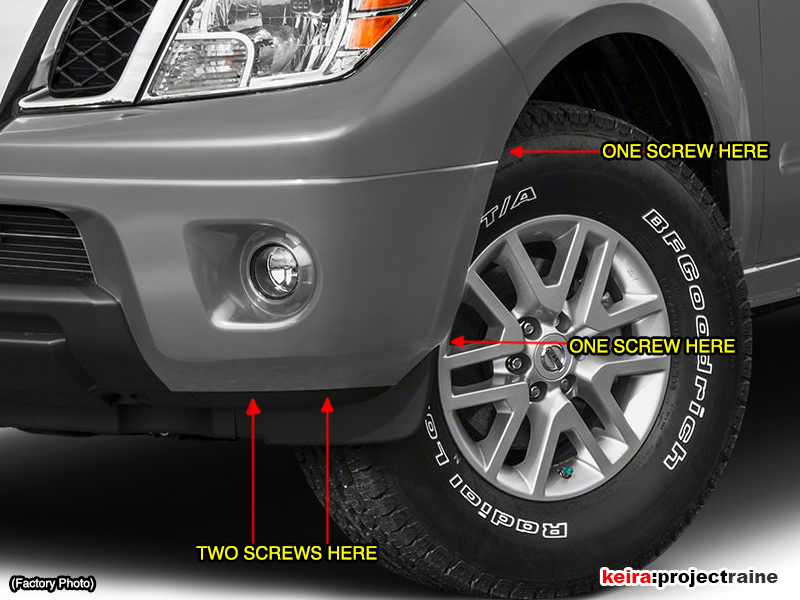
STEP 2: Now to gain access to the OEM fog lamps – you don’t have to remove the wheel and tire, just crank the steering wheel all the way to the left to work on the left side, and vice versa. Using the Phillips screwdriver, remove 4 screws holding the fender liner in place: two underneath the front of spoiler/lip, one at the bottom edge of the wheel well, and one a little higher up in the wheel well. With these screws out you should be able to “peel” back the fender liner enough to access the OEM fog lamps.
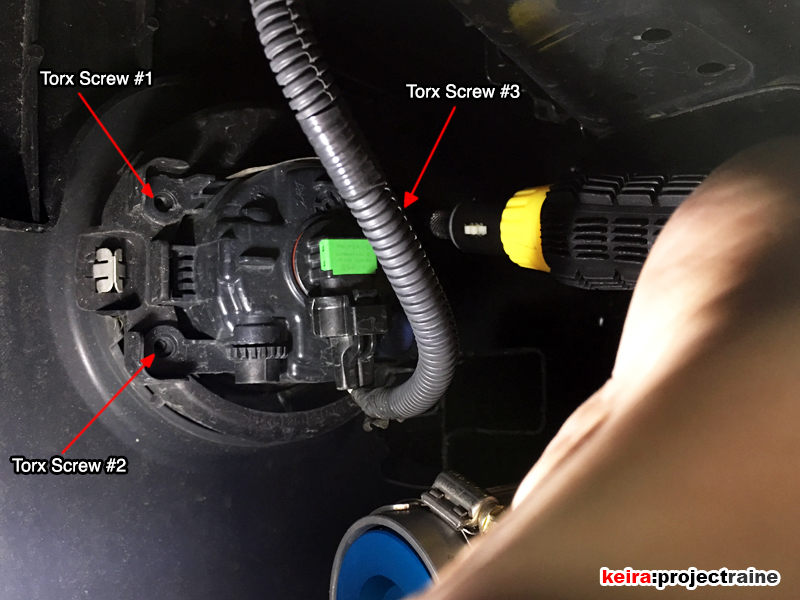
STEP 3: Now to remove the OEM fog lamp. Reach into the rear of the bumper and using the Torx T20 bit, remove the three Torx screws holding the OEM fog lamps in place. It’s weird because there are four mounting points but there’s only 3 Torx screws.
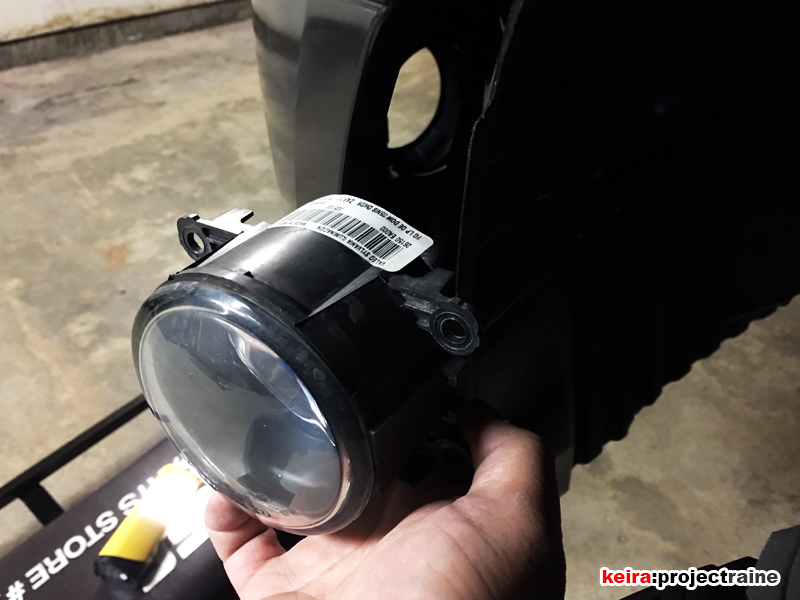
STEP 4: With the screws out, give the OEM fog lamp a tug and it will come out; don’t be afraid to pull on it, it’s sandwiched between two tabs but they won’t break. Unplug the harness and set the OEM fog lamp aside.
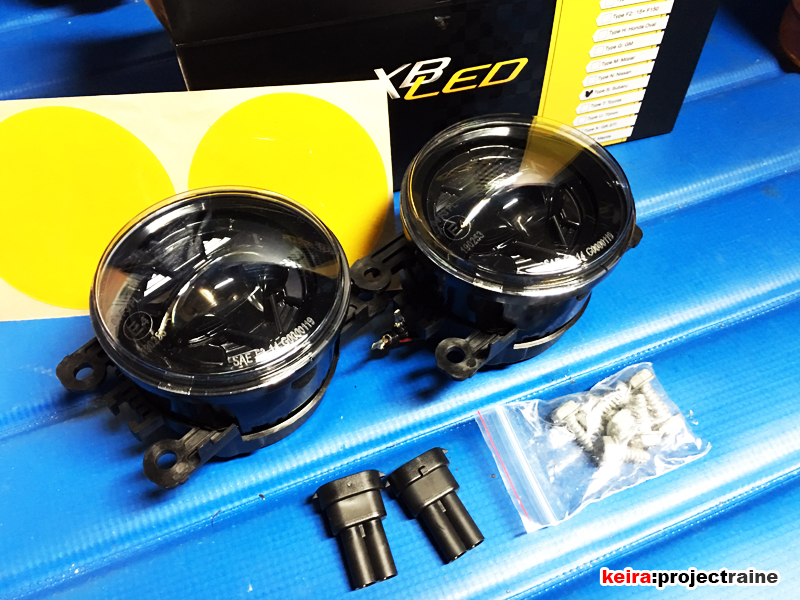
STEP 5: Now on to the new Morimoto LED fog lamps. This is how they look out of the box: You get two LED fog lamps, a pair of socket plugs, and a bag of large mounting screws. (Lamin-X film shown in photo, but removed). The screw bag will not be used; they’re larger than the stock screw; maybe these fit Subarus which share the same fog lamp design.
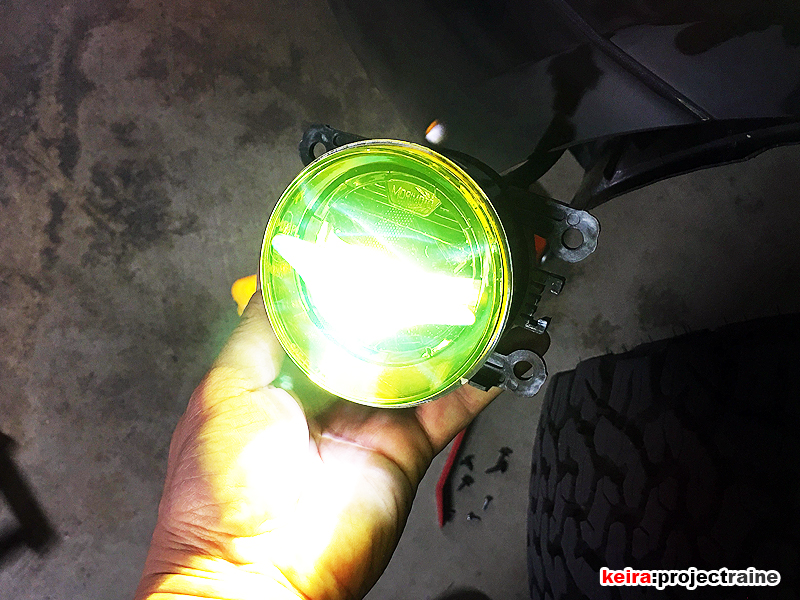
STEP 6: Before you plug anything into anything (lol), take one of the included socket plugs and plug it into your factory fog lamp harness. Use the Sharpie marker to note the wire polarity (I just write a “+” and a ”-“ symbol directly onto the socket), then remove the socket from the factory harness and insert the new fog lamp wires into the correct places, positive to positive and negative to negative. Plug the new fog lamp into the vehicle harness and turn the lights on real quickto make sure that it lights up. If not, you have to swap the wires.
STEP 7: Installation of the new LED fog lamp is the reverse of removing the OEM fog lamp. Bolt both new lamps in, but do NOT reinstall the fender liner yet (see next step). When you put the new fog lamp in place, it won’t just sit flush – you have to squeeze the fog lamp bracket in between the two tabs. Don’t be afraid to use some muscle here – it won’t break, it’s just a tight fit. Secure with the same OEM Torx screws (again, do not use the larger bolts included with the new fog lamps).

STEP 8: With both new lamps installed and plugged in, turn your lights on and check the aim of the new LED fog lamps compared to the masking tape reference on the wall. If you have to adjust the height, there is a grey plastic adjustment screw on the back of the XB lamps; turn the screw clockwise to lower the beam, and opposite to raise the beam. <— if I got that wrong, tell me but either way you’ll know which direction does what simply by watching the light beam move up and down as you turn the adjustment screw. Once you get the alignment right, reinstall the fender liner screws and you’re done.