Excelon.
The timing couldn’t be better – when I was looking all over the Internet at Alpine, Pioneer, and other double-DIN head units I saw word of Kenwood’s upcoming Excelon DNX-892 Double-DIN Head Unit and it had all of the features I was looking for at the time: 7-inch touchscreen, built-in Garmin navigation, hands-free phone integration, dual USB ports, steering-wheel control compatibility, and iPod control. It also had extra features I knew I would find a way to make use of: digital time alignment, full-size HDMI port, iPhone screen mirroring, programmable aux. switch, etc. Luckily, the head unit was released and I took delivery the following weekend after my main speaker installation.

Since I was going with a full aftermarket head unit, I could remove the line output converter from the original setup since I could now connect the Alpine PDX-V9 amp directly to the Kenwood’s RCA outputs. This also gave me a reason (or excuse, depending on how you look at it) to completely replace the current wiring with all new stuff including matching JL Audio RCA cables, direct amplifier turn-on, as well as run the wires for the new features that the Kenwood had like the hands-free microphone. Just for reference, on top of the head unit cost, the extra wires/adapters I needed to get everything working as described in this post include:
- Main Harness: Modified Metra 20-pin Harness w/SWC wires, $17
- OEM Steering Wheel Control Adaptor: Axxess ASWC-1, $50
- OEM AM/FM Antenna Adaptor: Metra 40-NI12 (included with head unit purchase)
- OEM USB Adaptor: Axxess AX-NISUSB-2, $7
- OEM Rear Camera Adaptor: Axxess AX-NIS32SWC, $12
- Aux. Front Camera: Pyle PLCM38FRV, $19


At this point I had the head unit installed, and all of the factory features were retained:
- The OEM factory steering wheel audio controls work 100%
- I can adjust the music volume and change tracks/stations
- I reprogrammed the ‘mode’ button to attenuate the music (mute)
- The OEM factory telephone controls work 100%
- I can answer and make calls in combination with the Kenwood’s voice recognition feature
- The OEM factory USB port in the center console works 100%
- I can play iTunes audio and charge my iPhone at the same time
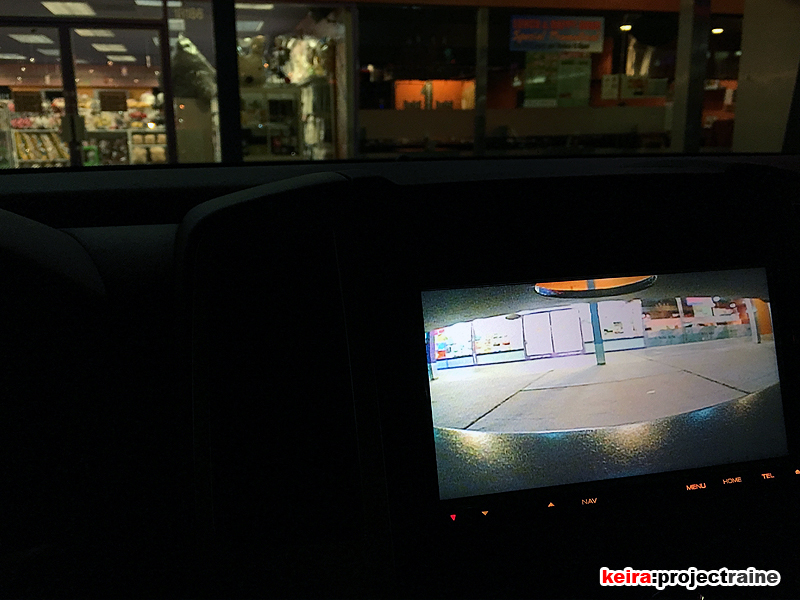
- The OEM rear camera in the tailgate works 100%
- I can also turn the camera on with the touch of a button.
The Kenwood also has its own programmable parking guidelines, and the OEM backup radar is fully functional. Also, the rear camera would show in screen immediately whenever I started the truck and put it in ‘R’, even if the head unit itself wasn’t done booting up yet (takes about 15-20 seconds.)

To make use of the head unit’s dual camera inputs, I installed a front camera in the bumper opening, right above where the license plate holder is. It is also a day/night camera with IR LEDs that work pretty well for its size. I can also switch between the rear camera and front camera with a single tap on the touchscreen. Helps when parking in front of low obstacles, or checking for small animals in front of the truck. Just kidding.

As for the built-in HDMI port, I plugged in an Amazon FireStick powered by the second USB port. It’s been pretty useful whenever I wanted to catch the highlights of the UCI World Cup Downhill Mountain Bike racing while on my commute, or if passengers want to watch something on Netflix or Plex during road trips. With this I don’t have to have my iPhone tied up to playing video.

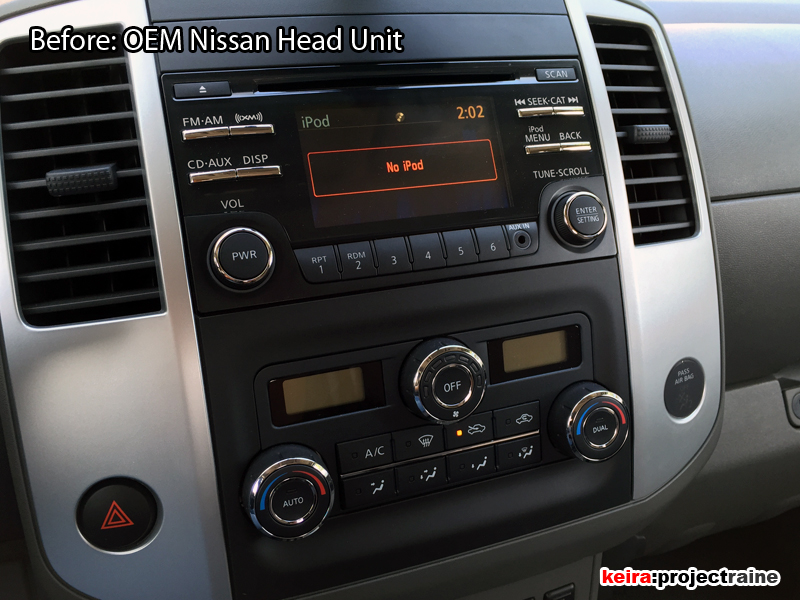
Before playing with any of the audio tuning functions of the head unit, I fired it up in “plain stock” mode just to hear how the Image Dynamics speakers sounded with the new head unit. Within seconds of hearing the first few notes of the test song, I knew the head unit made a big difference, as it was not limiting or attenuating the extreme high and extreme low frequencies that the OEM head unit was doing; the Kenwood let the Image Dynamics speakers work the way they were meant to. The highs were very crisp, midrange was clear, and vocals were very sharp.
I popped in a test CD that had a bunch of dynamic tracks and the DNX-892/ CXS-64 combo did the job in produced amazing sound. It wasn’t perfect yet for my ears (remember, I had yet to start playing with the audio tuning features), but there was a significantly huge improvement in sound compared to when my source was the OEM head unit. In fact, the OEM head unit really sucks sound-wise.

UPDATE 03.19.17: The Pyle PLCM38FRV camera was relocated to the rear.
UPDATE 05.01.09: Replaced/upgraded head unit to a 2019 Kenwood Excelon DNX-995s.