The Equalizer.
This isn’t exactly Nissan-Frontier-specific but it’s something I built specifically for my Frontier, so here it is. A couple of months ago one of my friends brought up 4-way inflation/air-down systems and at first, I thought it was unnecessary… until we went on our recent Cleghorn trail trip and I got to see his contraption in action. After trying out his DIY version, it got the gears turning in my head and I started thinking about how I could build my own setup, which I refer to as a “4-way Equalizer”.
For those who have never heard of a “4-way inflation/air-down system” before, it’s a DIY system of hydraulic air hoses that connect to all four of your tires at the same time. By connecting all four tires together (basically making one single air chamber) the air pressures inside each tire will equalize automatically so that all four tires are exactly the same psi. Plumbed somewhere in this system of hoses are a manual release valve (for airing down all four tires at once), an air pressure gauge (to check the air pressure of all four tires), and a quick-release air compressor fitting (for connecting to an air compressor when airing back up). There are a few pre-built systems you can buy online (that are over-priced, IMO) but I decided to try to build my own. To begin, I fired up Adobe Illustrator and started making some designs on (digital) paper, first. Then when I thought of some revision or had an idea or modification, I started another version. Eventually, I had A LOT of designs because I kept thinking of different parts or configurations I could use:

My initial goal was to try to stay under $150. However I knew I’d end up wanting to try different layouts and configurations, so although I ended up spending more than $150 when all was said and done ($250ish, the cost of experimenting!), I still kept that $150 target as far as “final cost to build my design” goes. That said, it was time to go shopping:
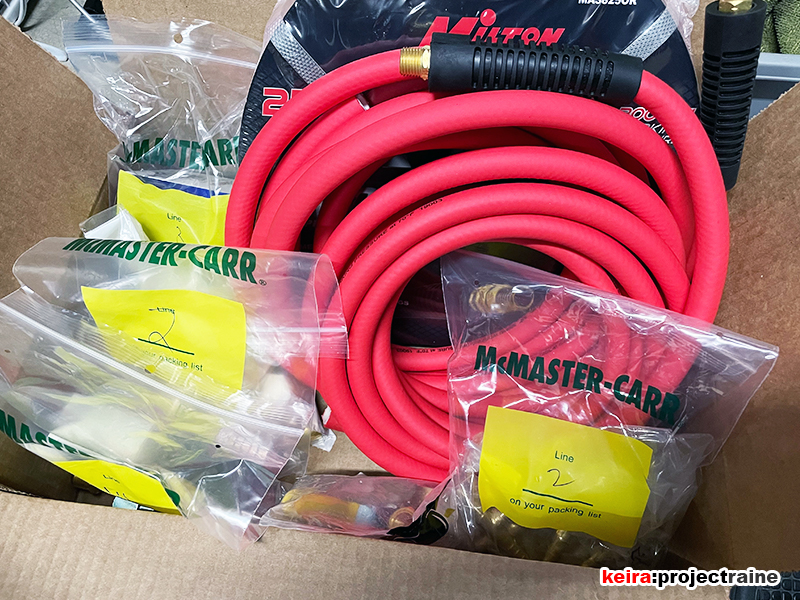

The fun part is just starting…

When you have to measure things and only have two hands, use some spring loaded clamps from the hardware store.
During the R&D portion I used regular hose clamps.

This was one of my test layouts, with 360-degree elbows and completely separate barbs.

First prototype version starting to come together…
…however, all these extra metal parts added too much weight.
If you noticed the last two photos, my initial layout started from the front-right tires, around the back of the truck, ending at the front left. Unlike the common “Y-shaped” designs you see on YouTube, I took this opportunity to experiment and try something different. The purpose of making this first version a single length of hose (as opposed to a Y-shape that splits to either side of the truck) was with the thinking of having a system that would roll up for storage as a garden hose would. However, it got cumbersome and too heavy due to all of the swivels and joints I incorporated to fight the problem of “hose twist”. Eventually, after trying a few different builds, I let go of the “single line” idea and proceeded to draw up more conventional Y-shaped designs from this point forward.

Disassembled, time to try another version.
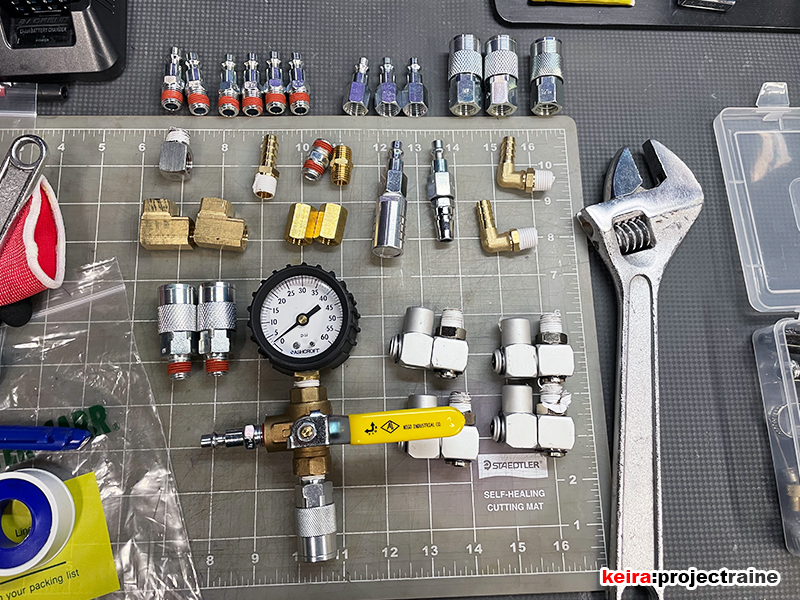
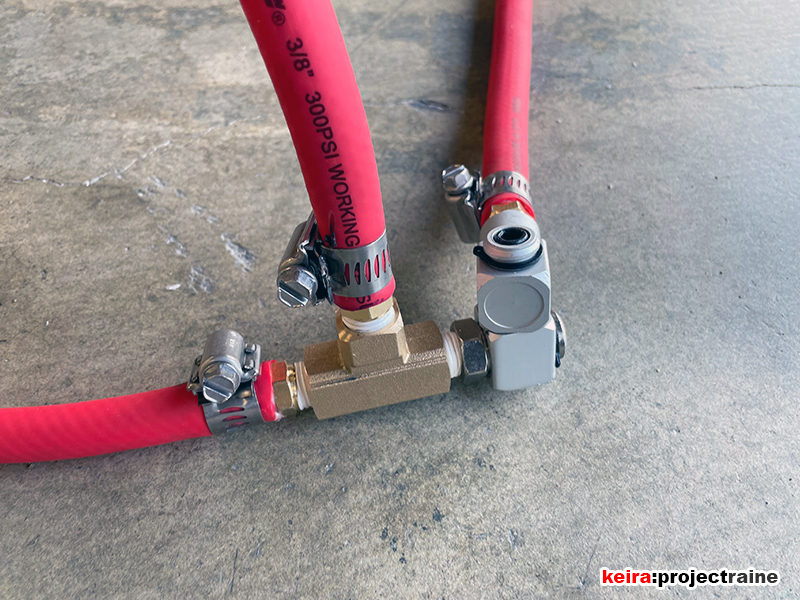
Fittings, fittings, and more fittings. At least I figured out the gauge setup.

I decided to use ear clamps when I knew I had my final design, as they are more low profile compared to regular hose clamps.

Heavy-duty heat shrink to protect my hands from “clamp cuts” (if you work with clamps, you know it happens).

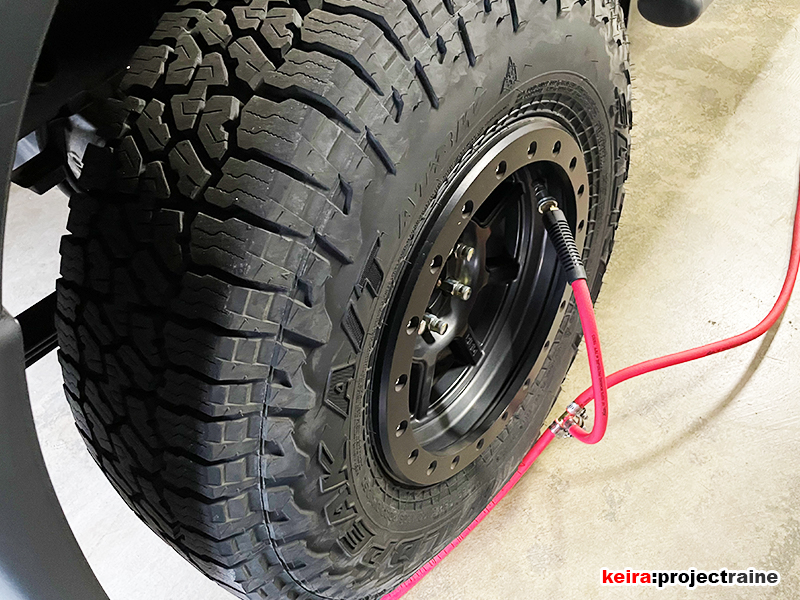
Another version. I did a lot of test runs in my garage, airing down and up with every version I built.

Some more experimenting with fitting layouts.

Testing another version’s “air-up” function with my DIY Viair air compressor toolbox.

The final price of the parts used (not including tax) came out to about $162, which is $12 over my target – but very reasonable for the system I built. This includes quality parts (I didn’t just pick the cheapest parts I could find to try to meet the budget), with the most expensive (and IMO most important part) being the Haltech lock-on air chucks. Here’s the break down:
- Lock-on air chucks (5x), $46.48
- 3/8″ air hose, 25-feet (2x), $27.68
- 3-way ball valve, $19.99
- Air pressure gauge, 0-60-psi, $14.06
- 90-deg. swivel barbs (2x), $13.98
- 1/4″ quick connect couplers (3x), $9.97
- 1/4″ quick connect fittings (2x), $ 3.98
- 3/8″ brass barbs (8x), $ 8.00
- 1/4″ brass T-fittings (2x), $ 5.60
- 1/4” brass 3-way splitter, $ 2.80
- 15.3-18.5mm ear clamps (11x) $2.75
- 1/4″ filter muffler, $3.00
- 1-1/2″ heat shrink tubing, 4-feet, $4.00
TOTAL PARTS COST $162.29
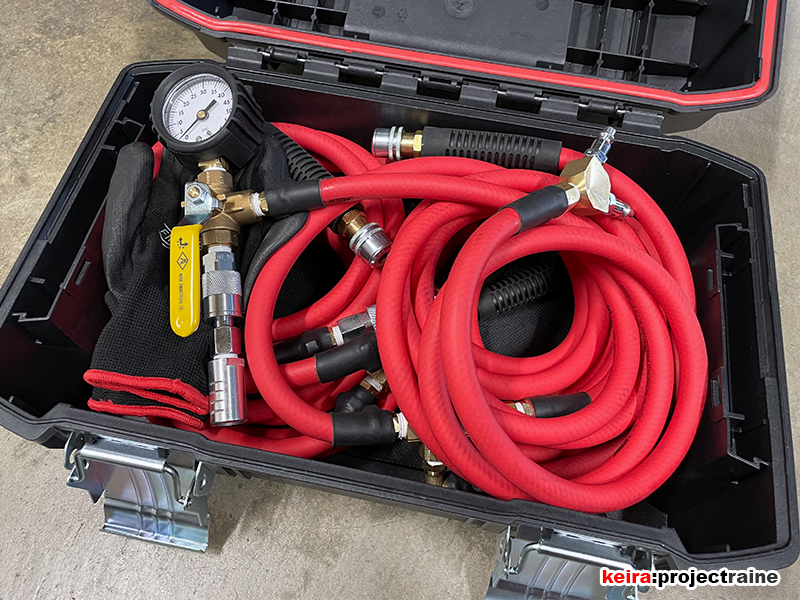
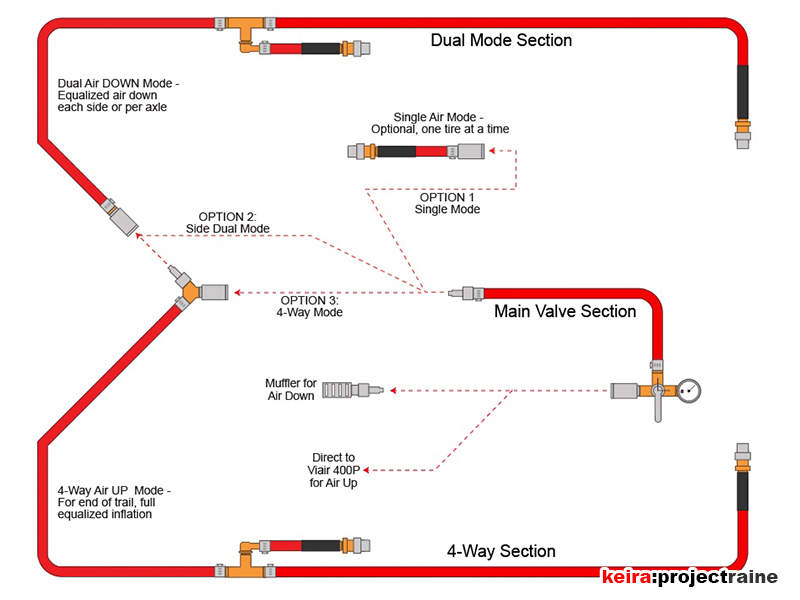
Due to the number of hoses I used (3/8″ too, not the smaller 1/4″ size) the “full” 4-tire system requires its own, matching toolbox to transport. However, by positioning quick-release fittings in strategic locations, my final design is a modular one, and I have the option to bring as little or as much of the system with me as I want to:
- The “Single Mode” (Option 1) acts as a minimalistic, single deflator/inflator, one tire at a time.
- The “Dual Mode” (Option 2) does two tires at a time and is still compact enough to fit where my stock Viair hose sits in my DIY air compressor toolbox, so I would only need to bring one toolbox.
- Finally, the “4-Way Mode” (Option 3) covers all 4 tires at the same time, for those end-of-the-trail air-up sessions where I can fill all four tires up to road air pressure simultaneously.