Tweet.
So a couple months ago I finally got around to working on a project I’d had in my mind for quite some time now – custom front tweeter pods for my Hertz HT-25 tweeters. They already sounded great, but I wasn’t 100% happy with the stock dash locations due to the fact that it aimed the dash speakers (or tweeters, since I was running components) up toward the windshield. Sure, it made the sound bounce and spread towards the cabin which was by design but when it came to distinct left/right separation it wasn’t as “pinpoint accurate” as I was looking for. The solution was to figure out how to aim the tweeters towards the cabin where the sound would have a direct shot to the listeners (instead of bouncing off glass first).
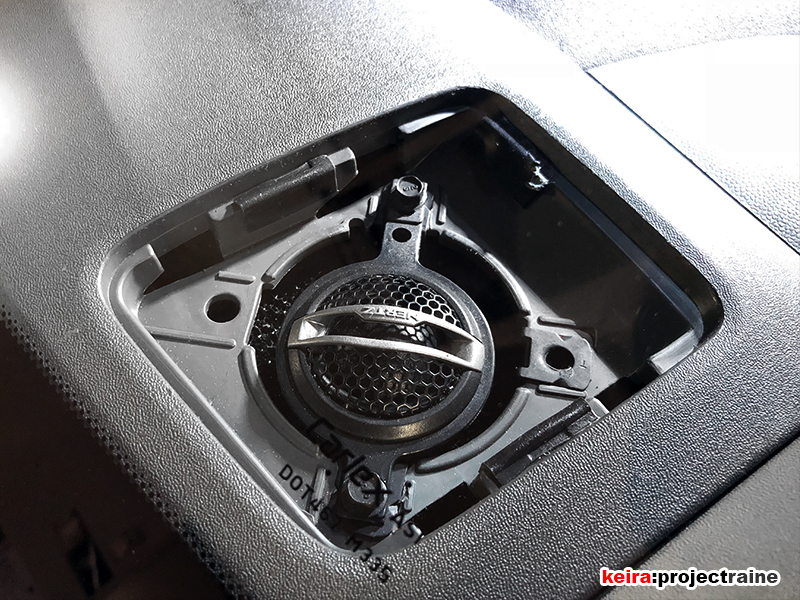
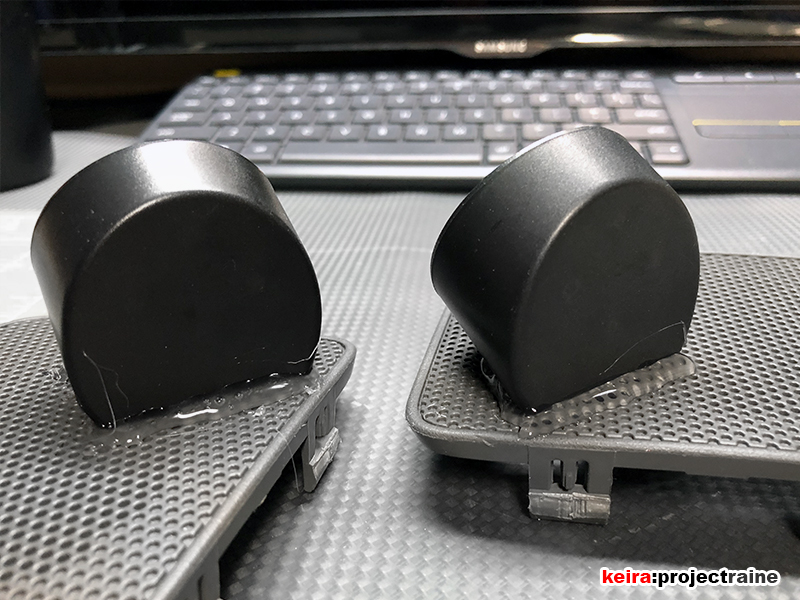
I thought about flush mounting the tweeters into the A-pillar but that would only bring the tweeters out of the dash. They would be still be aiming towards each other, not directly towards the cabin. Also, this might be a little odd but it would bother me that I’d have dash speaker grills with no speakers underneath them. The solution I came up with was to fab up some custom tweeter pods that would elevate and aim the tweeters from the factory dash location. I already had a pair of extra dash grilles so the plan was to build custom fiberglass pods using the dash grilles as a base and the Hertz surface mounts (included with my Hertz HSK-165 6.5″ Components) to create a pod that would literally snap into place where the OEM dash grill is.
Oh, by the way: I’ve never done custom fiberglass before. Yikes!
Right… so instead of whining about it on a forum (LOL) I decided to teach myself/learn how to make my own fiberglass tweeter pods. I did the research with online tutorials, I watched countless YouTube videos and have seen 423,244,090 different ways a speaker pod is made, and then I jumped right in. To be honest I pretty much already had a good idea of the steps that were involved; a lot of the “prep/research” time was picking the right chemicals as I didn’t want to use any cheap stuff for something I knew I was going to spend some time and labor on. Here’s what the “parts” list for this project ended up looking like:
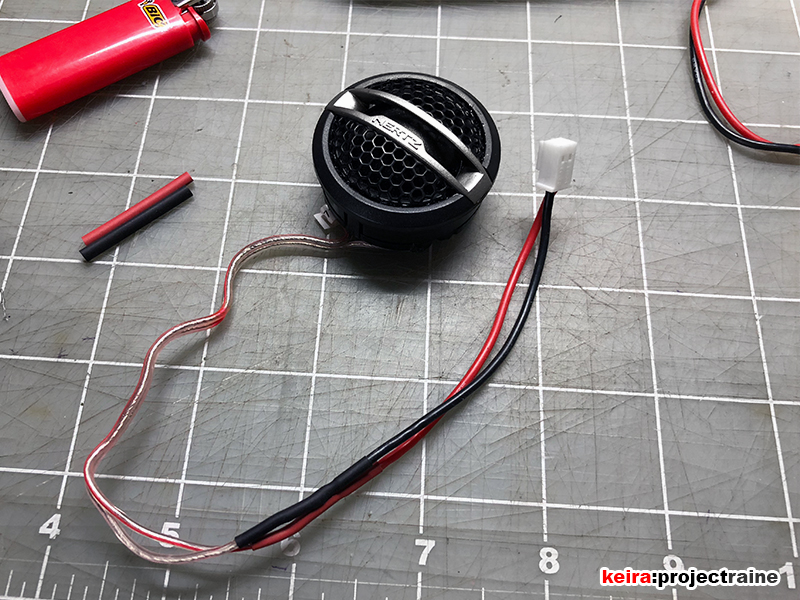
- 2x Hertz HT-25 tweeters (included with component system)
- 2x Hertz HT-25 surface mount cups (included with component system)
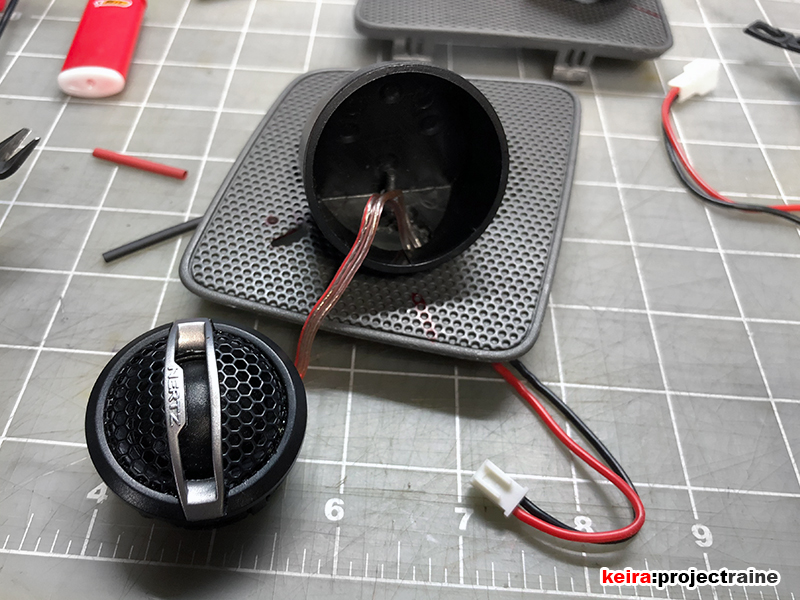
- 2x OEM Nissan Frontier dash speaker grilles ($20)
- Evercoat 499 Fiberglass Resin, 1-qt. ($35)
- Evercoat 911 Sea Glass fiberglass cloth ($16)
- Evercoat 425 Metal Glaze Ultra, 30-oz. ($35)
- Evercoat 360 Cream Hardener ($5)
- SEM High Build Primer, 16 oz. ($22)
- SEM Low Luster Clear Color Coat, 12 oz. ($16)
- Bottle of CA glue ($5)
- 3M Sanding Sponges in 60/180/220-grit ($12)
- 3M Pro Grade Sandpaper, 440-grit Extra-fine ($4)
- 3M Liquid Resin Hardener ($3)*
- Custom mixed SEM Color Kit paint from a painting buddy (free)
- Old pair of the girlfriend’s pantyhose (free, duh)
- Water spray bottle
- Some metal sanding files I already had, gloves, etc.
*only bought this because I misplaced the hardener that came with the Evercoat resin
A lot of the stuff above I already had, I mainly had to buy the resin/body filler stuff and the paints. So here we go… but first I had to make a small mod to the HT-25 tweeters. Since I knew I was going to be removing/reinstalling the tweeters numerous times during this project I went ahead and soldered in some small connectors on the tweeter leads to allow me to quickly plug and unplug them when needed:
Next, with some guesswork (as far as positioning) I started experimenting with the angle and location of the tweeters. Using the Hertz surface mount cups, I used a simple bolt and locknut to attach them to the dash grilles. This way I could rotate the cups easily while trying to find the right angle for the tweeters. From here I temporarily stopped working on the project because I wanted to take the next few days just driving around, listening to music as I usually do, and experimenting with the direction of the tweeters.
A few days? Fast forward about 21 days! During the experimental period I ended up repositioning the mounting bolt 3 times, and adjusting the angle of the tweeter cups countless times, until one day I thought to myself “hey, I think that sounds pretty good” – so 3 weeks later I continued the build. The next step was to secure the mounting cups exactly at the position and angle I was happy with. This was as easy as using my hot glue gun:
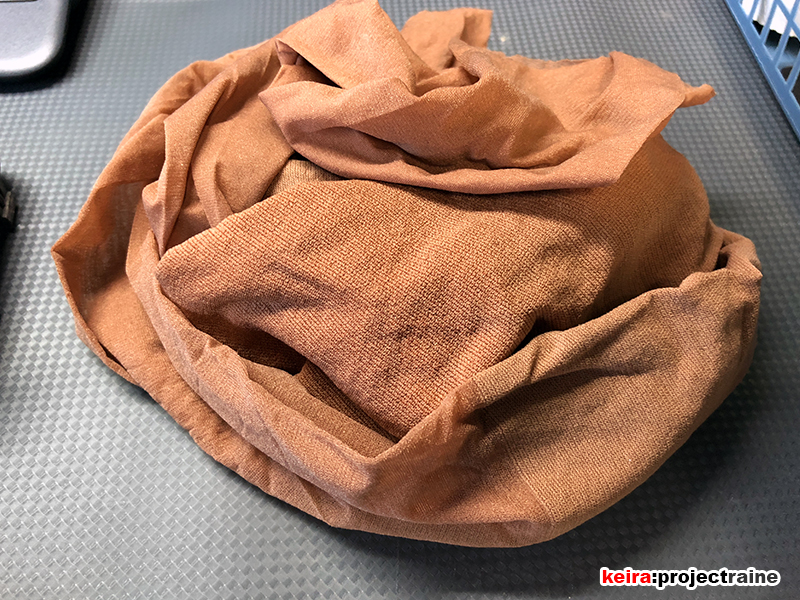
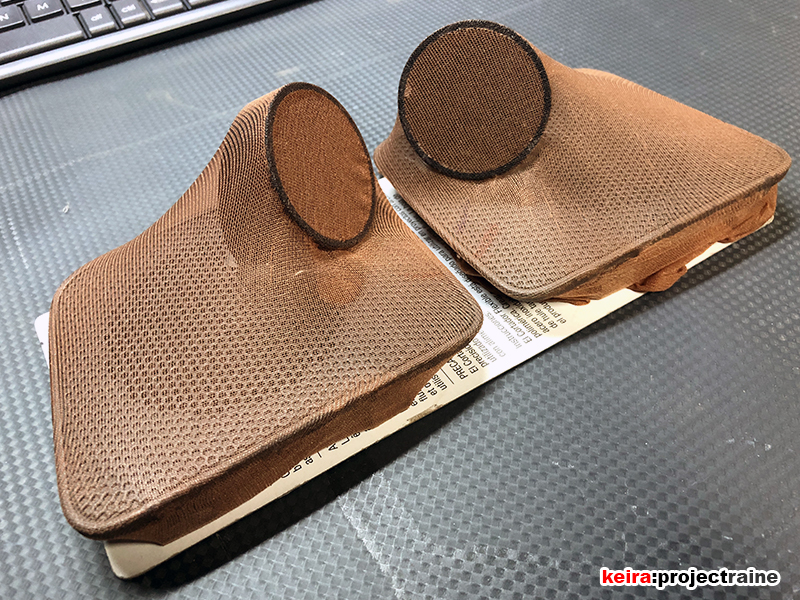
I didn’t care what the glue looked like because I already knew it would be covered anyways by the fiberglass shell. To start the shell I used an old pair of pantyhose donated by the girlfriend (yes, I asked):
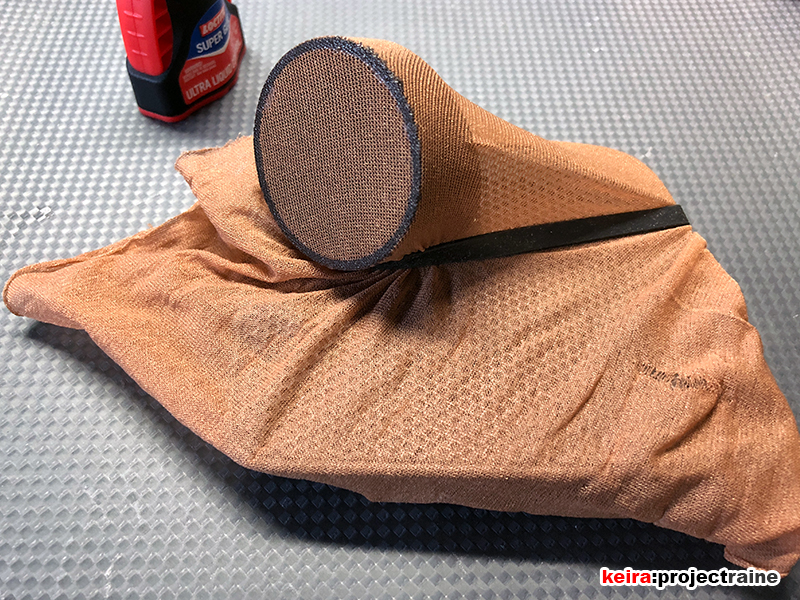
Since my design had a concave section to it I couldn’t just stretch the hosing over the whole thing and call it a day; to get the front part to curve from the bottom of the tweeter cups, I started by sticking the hose to the outer rim of the tweeter mounting hole using CA glue:
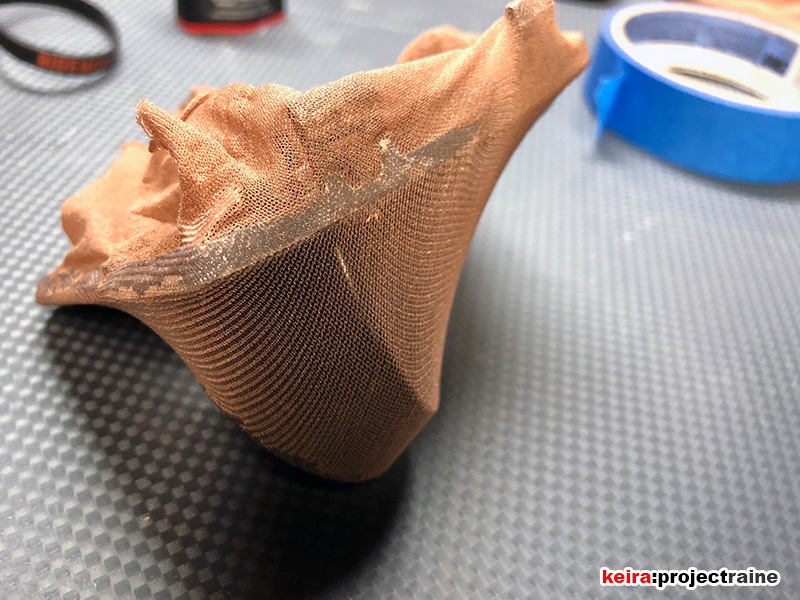
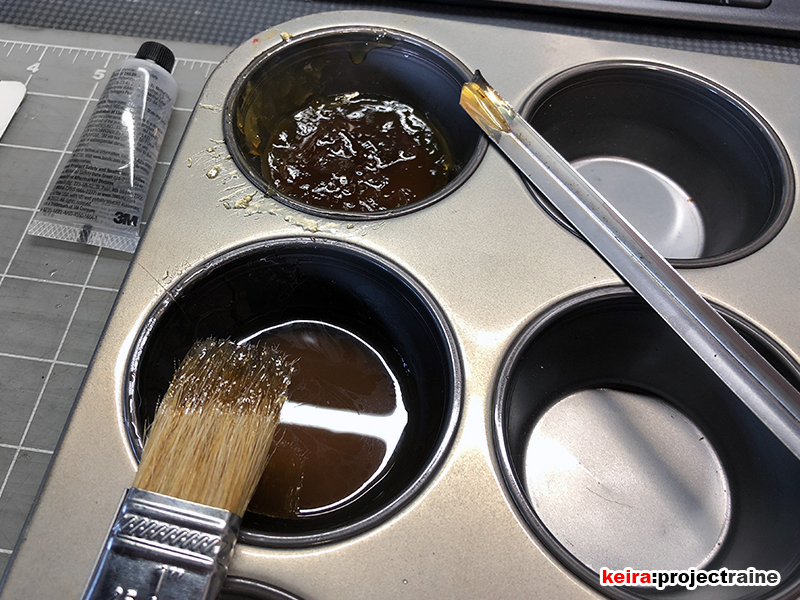
…followed by stretching the hose around the base of the pod (the OEM dash grille) and also gluing the edges in place with CA glue. With this step done I had the basic shape of my tweeter pods set. Next it was time to form the solid shell of the pod, so I coated all of the panty hose (except the part where the tweeter would go) with one layer of Evercoat 499 Resin. Remember how I said I’ve never worked with resin/fiberglass before? It’s a good thing I used an old cupcake tray to mix the resin, because it took a couple tries to get the mixture of resin and hardener just right (the first batch went solid in like 30 seconds… ooops!):
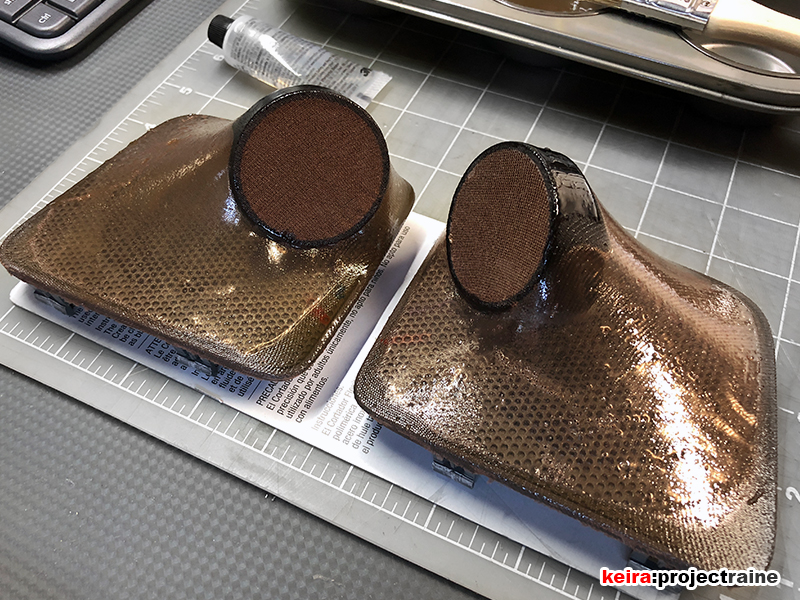
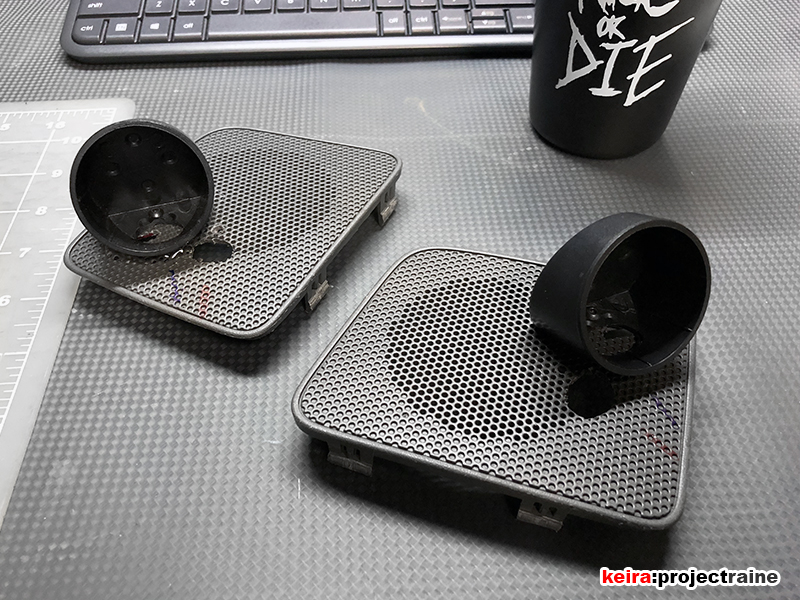
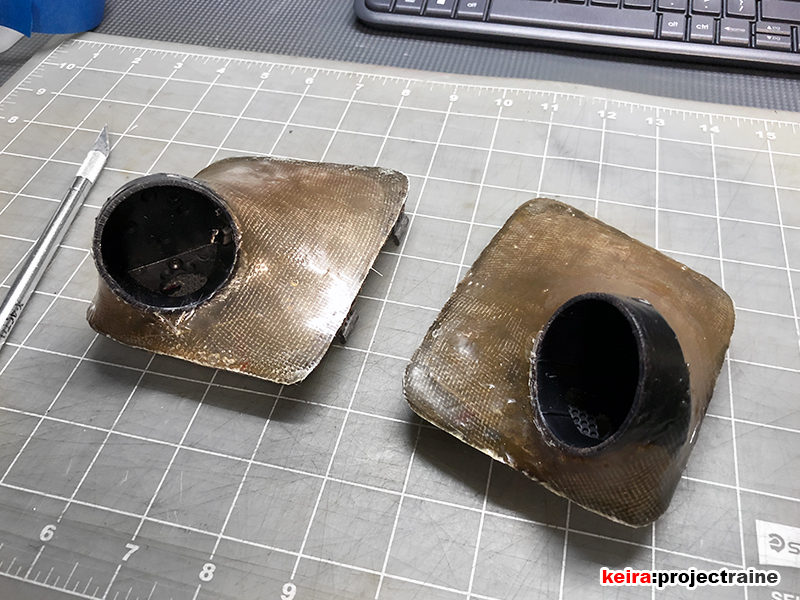
After allowing the first layer to dry I did a second layer – but this time I laid down some fiberglass cloth to add more strength. My fiberglass cloth laying technique was super newb, but I made sure to have total coverage. After the second layer dried I put a third layer of resin on for good measure and left the pods on my workbench overnight to ensure that all of the resin was dry.
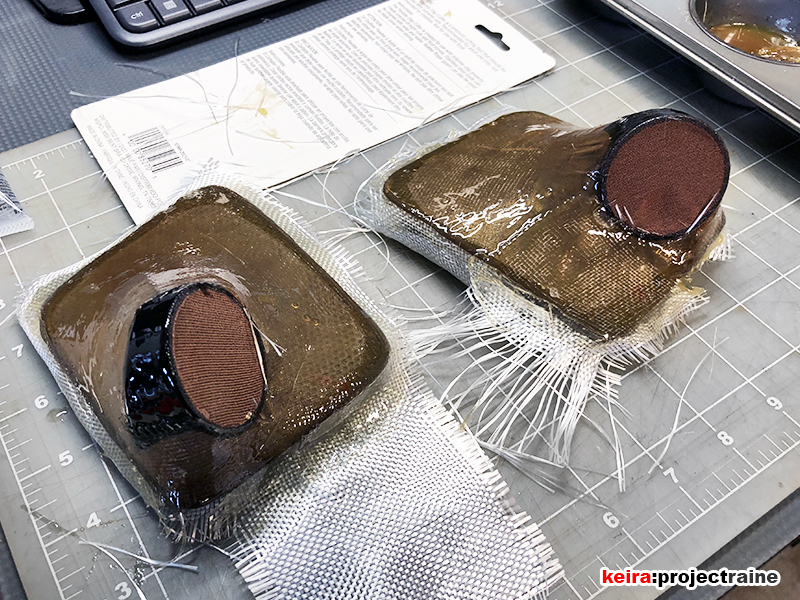
The next day I trimmed the excess around the perimeter and took a look at my work so far. The mounting cups were secure and in position. The 3 layers of resin was enough for a strong pod. Both pods were starting to take form… however, I only did a fair job laying down the fiberglass cloth (first time, remember!). After the resin dried, the outer surfaces of the pods had a lot of bumps and stray fiberglass strands that required lots of sanding in order to get the smooth, curved shape back.
So YAY – next, here’s where the hard labor began…